
Rub N Buff Mirror Makeover DIY

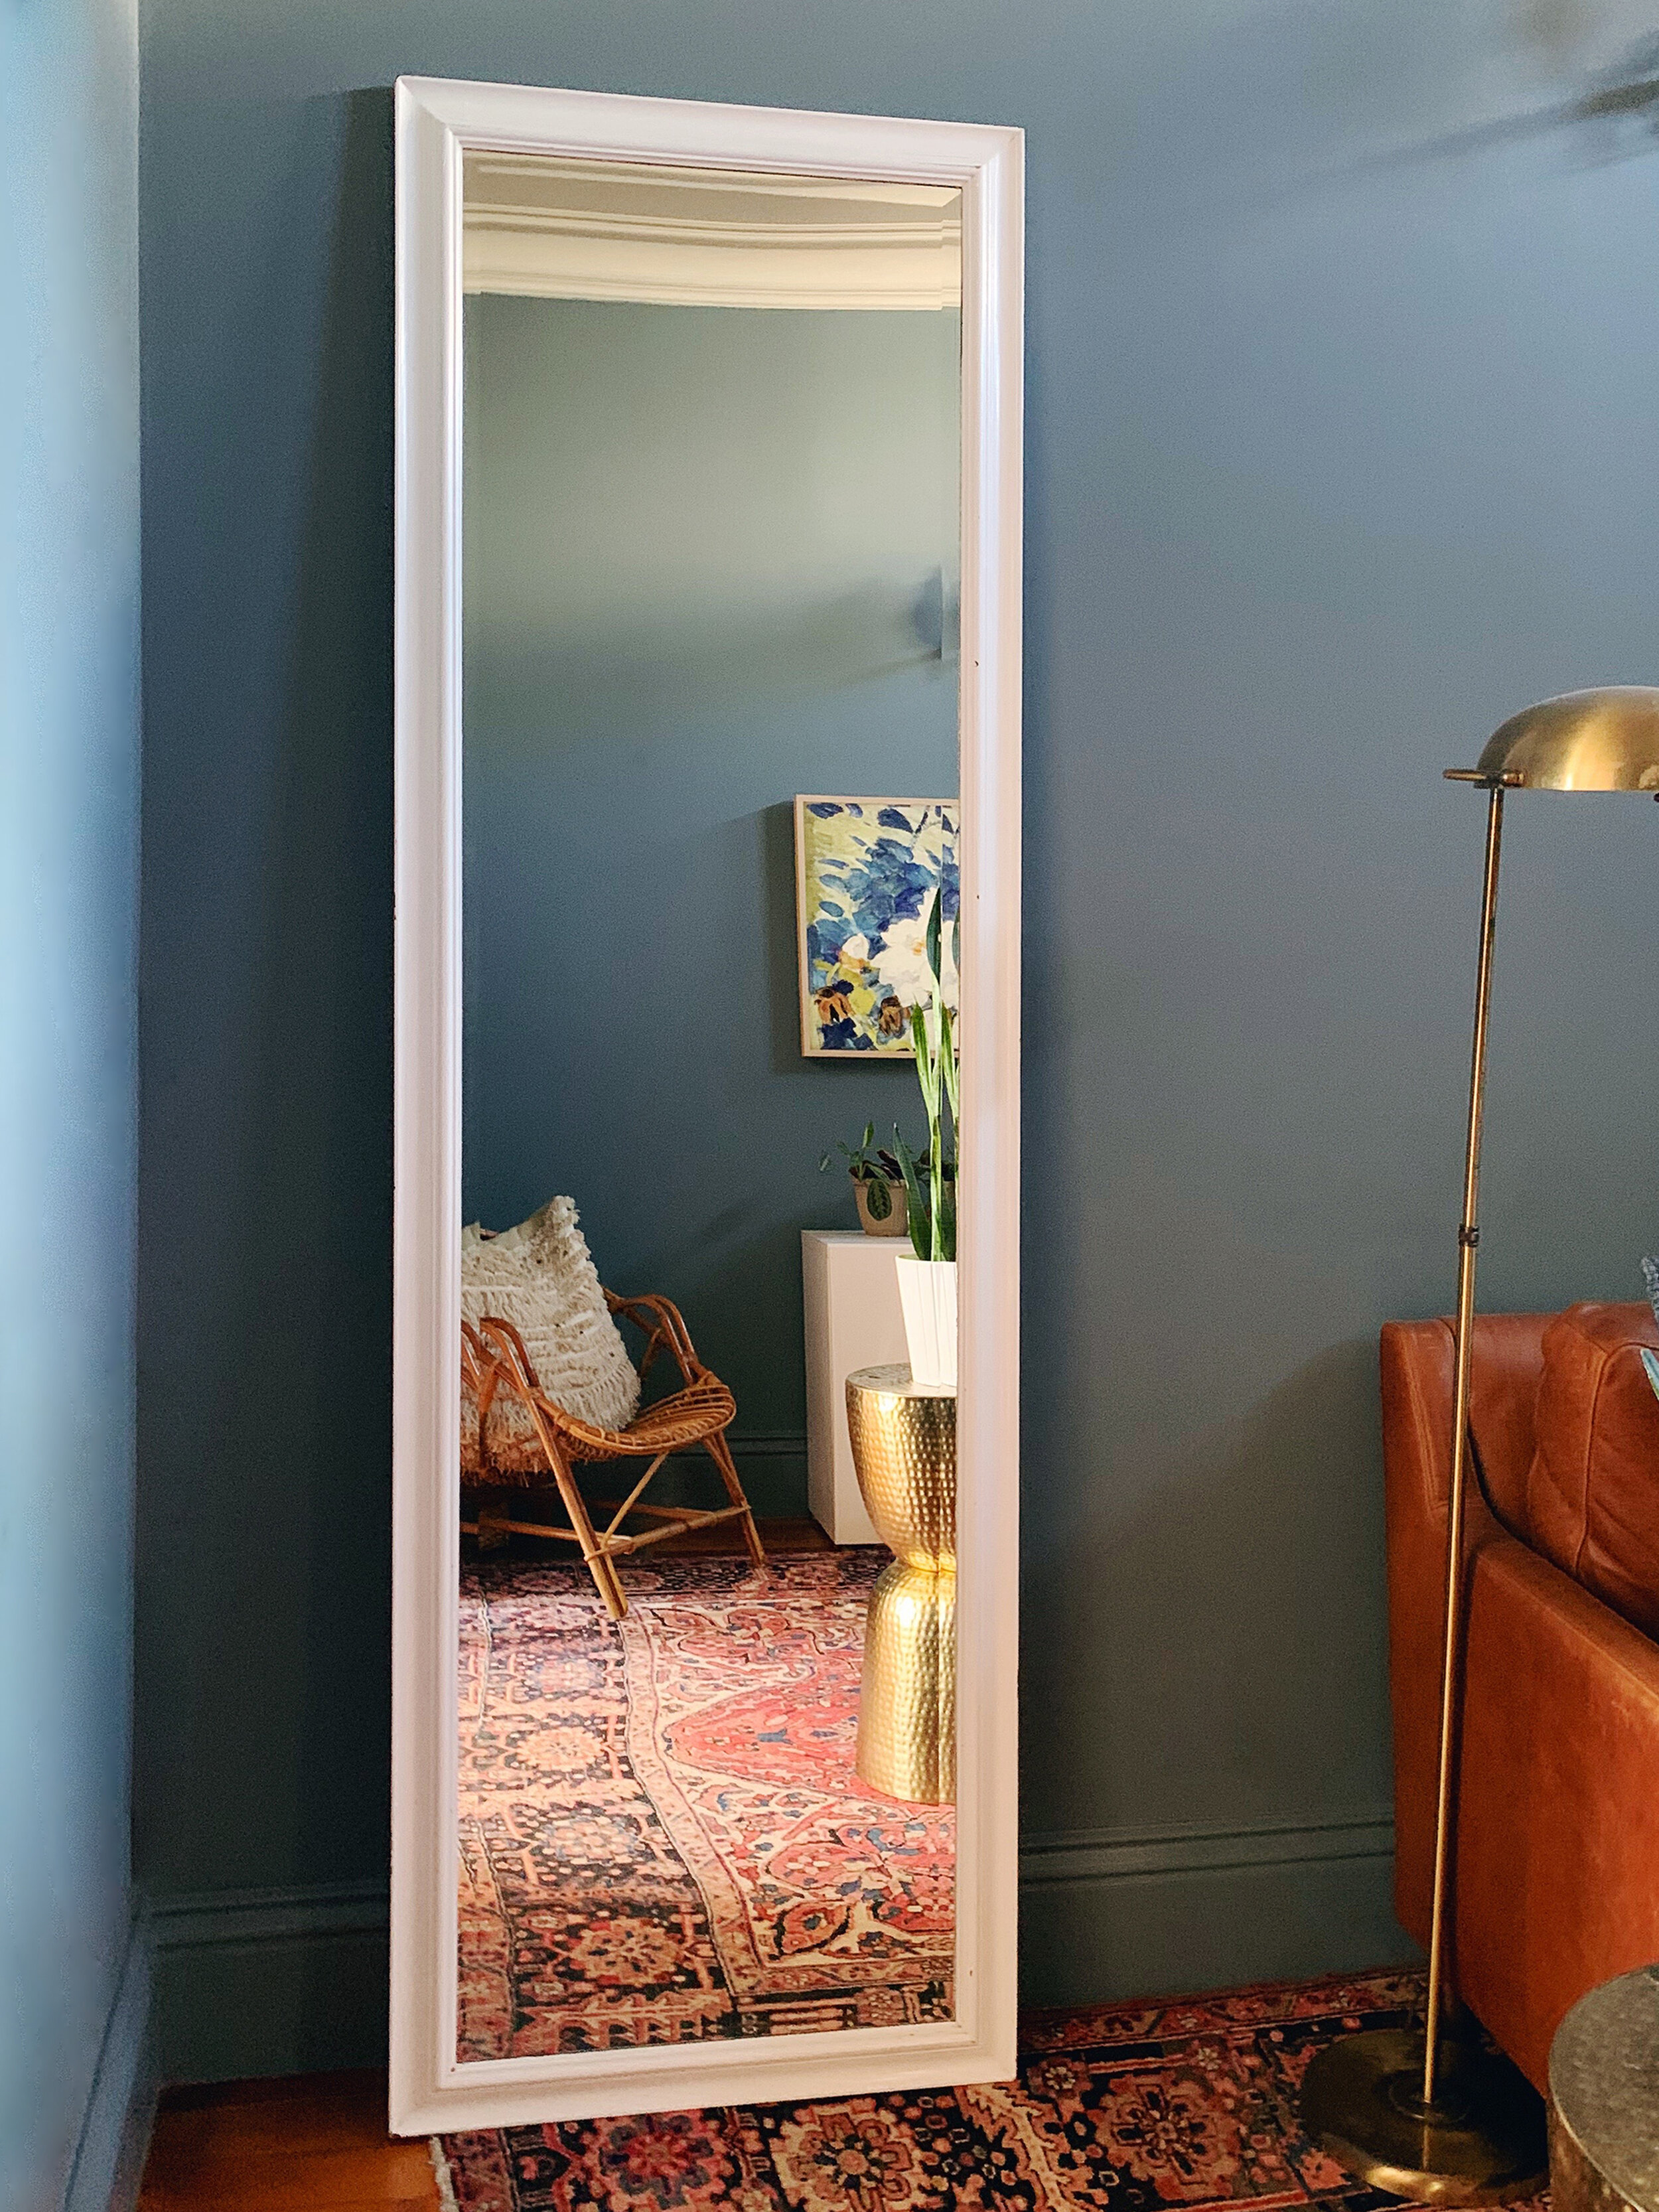
The Before
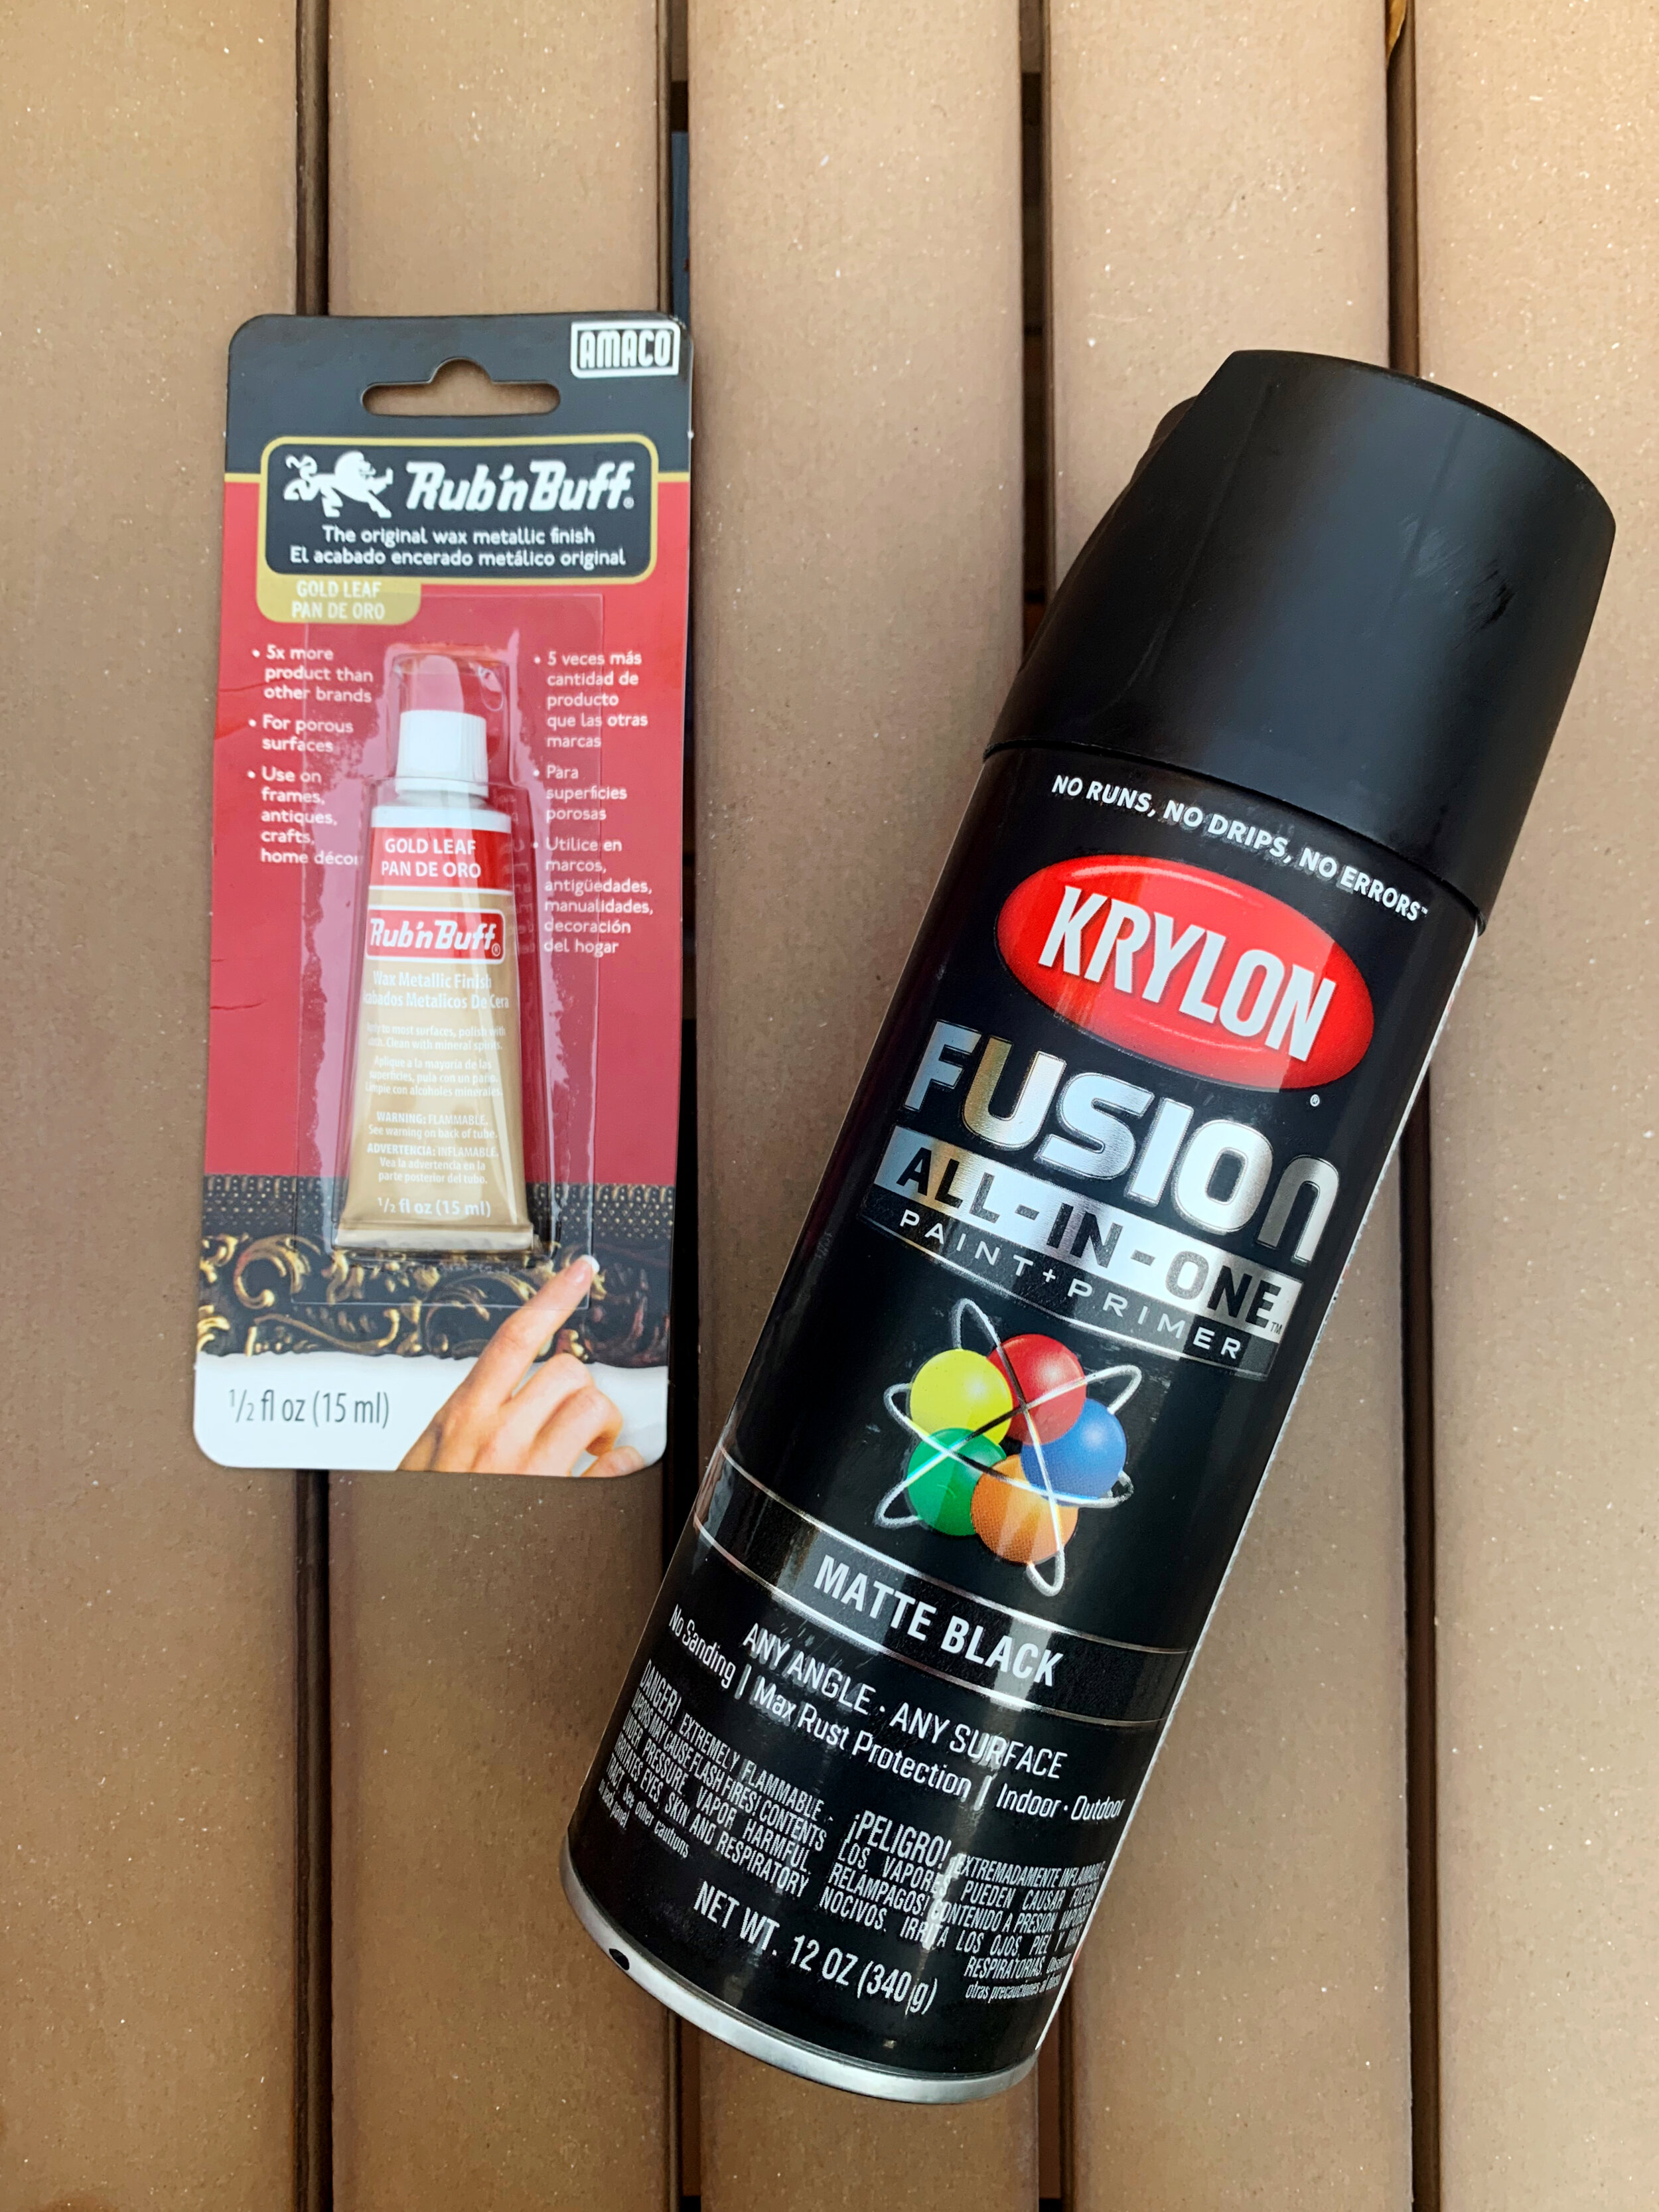
First, a little backstory about this mirror… it was a curbside find from back when I lived on the East Coast, and it has moved cross country and from apartment to apartment for a decade now. When I first found it, it was a deep shade of mahogany, and my apartment was all white walls, pale grey, and soft pastel tones, so I gave it a coat of glossy white paint. I picked it up because I loved the profile and its scale- in my shoebox apartment, it made a big impact and brightened up the space. Fast forward to our current home, a traditional Victorian filled with moody colors, and it didn't feel quite right. I had heard of the product Rub' N' Buff through a fellow blogger who routinely rescues furniture in need of a little love and restores it beautifully. I peppered her with questions on Instagram then did a little research of my own before deciding to tackle this piece… and I couldn't be more pleased with the results. The finish feels authentic, like it's been that way forever and aged gracefully, and it has so much more dimension that in I had just given it a coat of gold spray paint, and while it took a bit longer, I finished the project in just one afternoon.


Time:
One afternoon
Skill Level:
Easy/Moderate
Supplies:
Razor to Remove excess paint from mirror
Brush (optional), I used a foundation brush
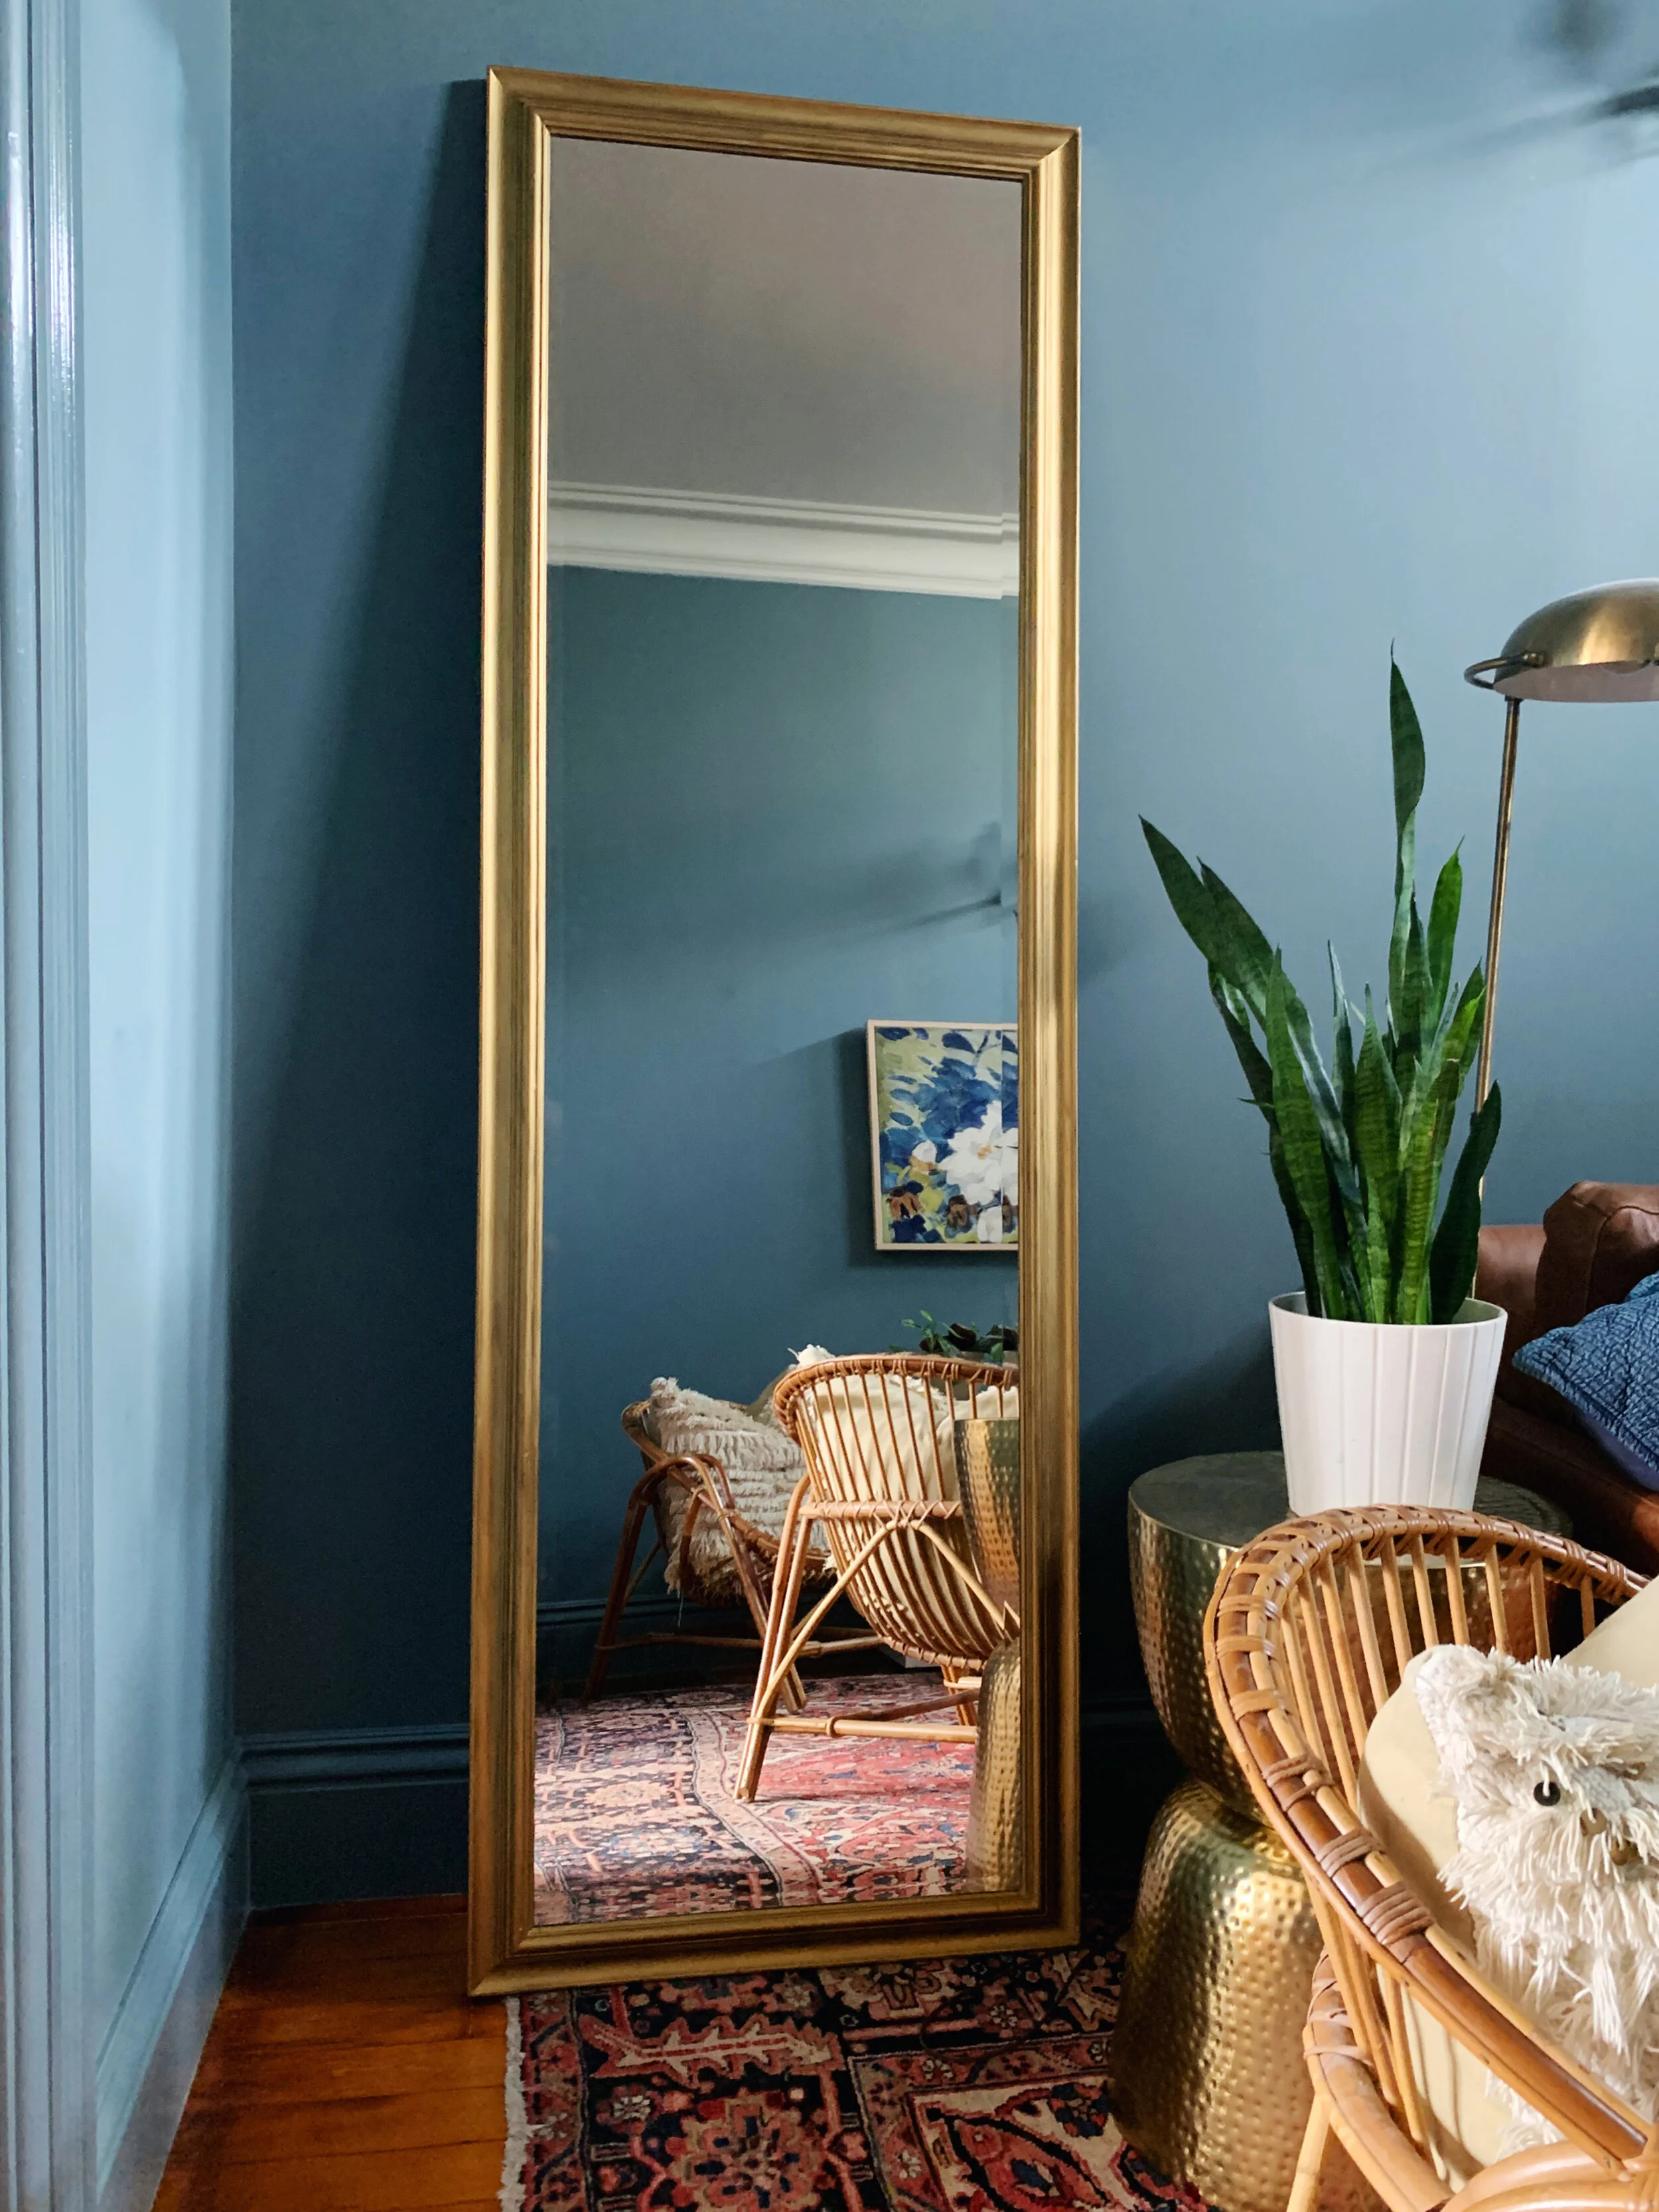
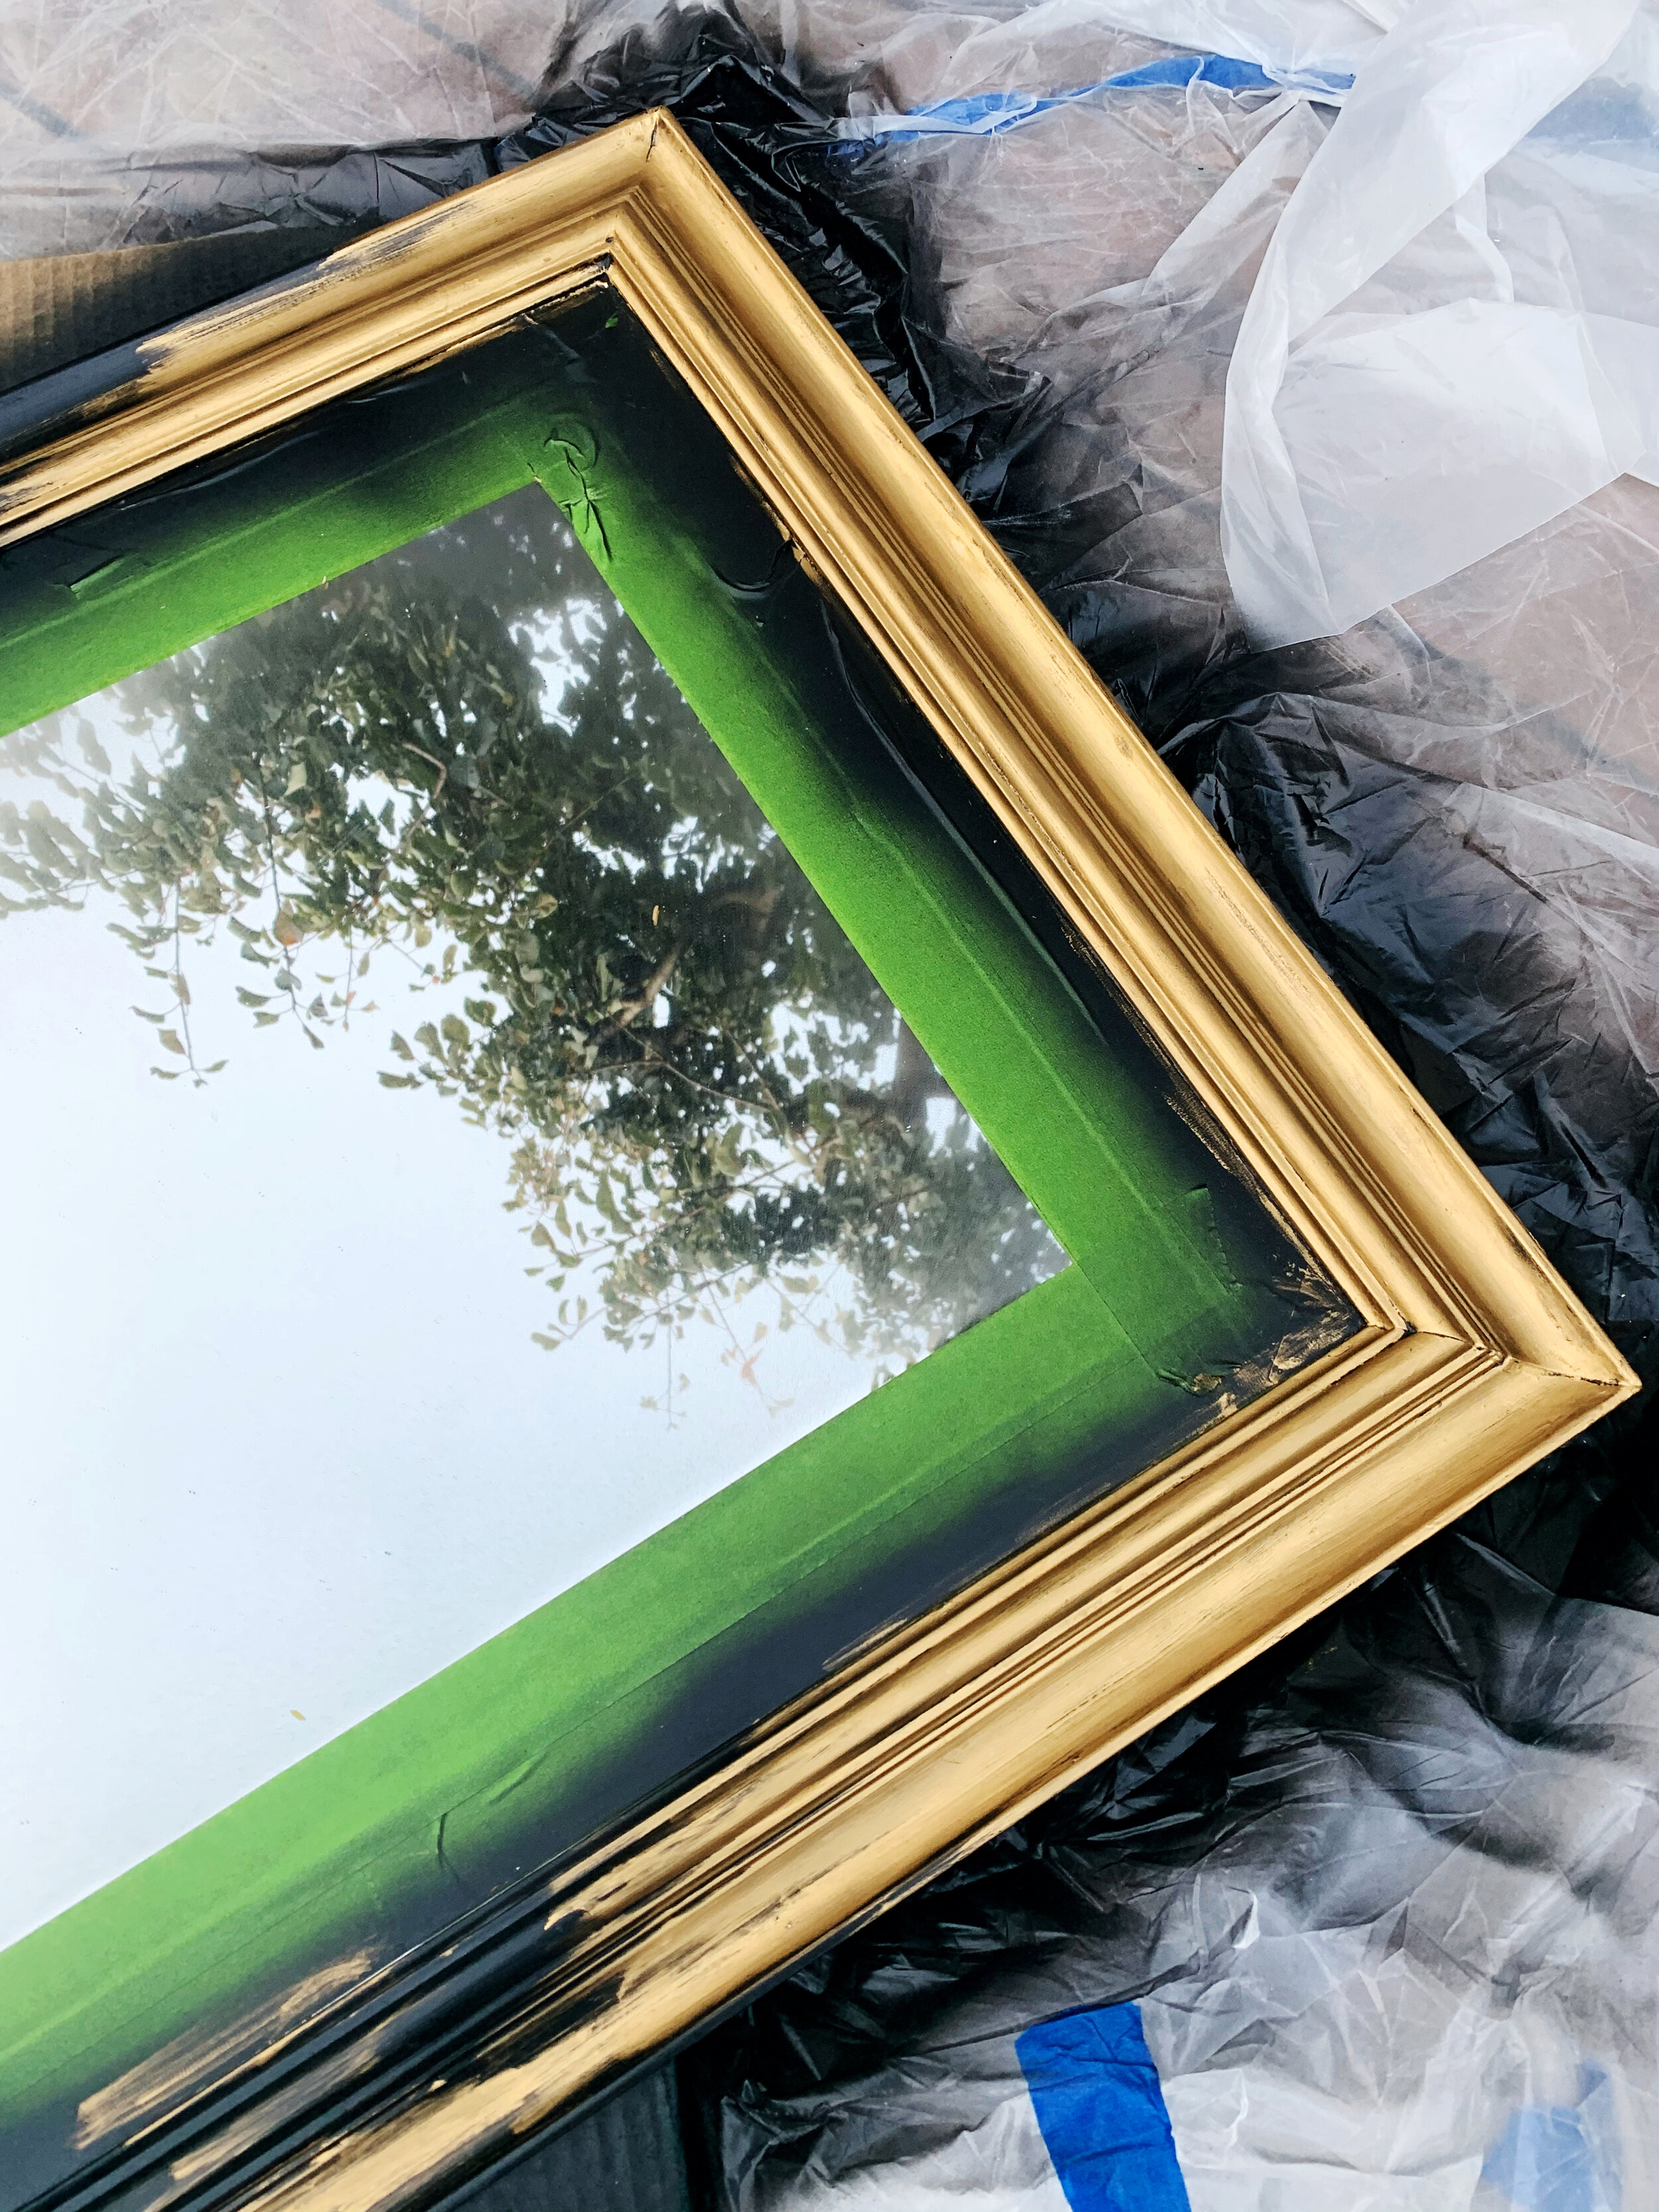
The after
How to:
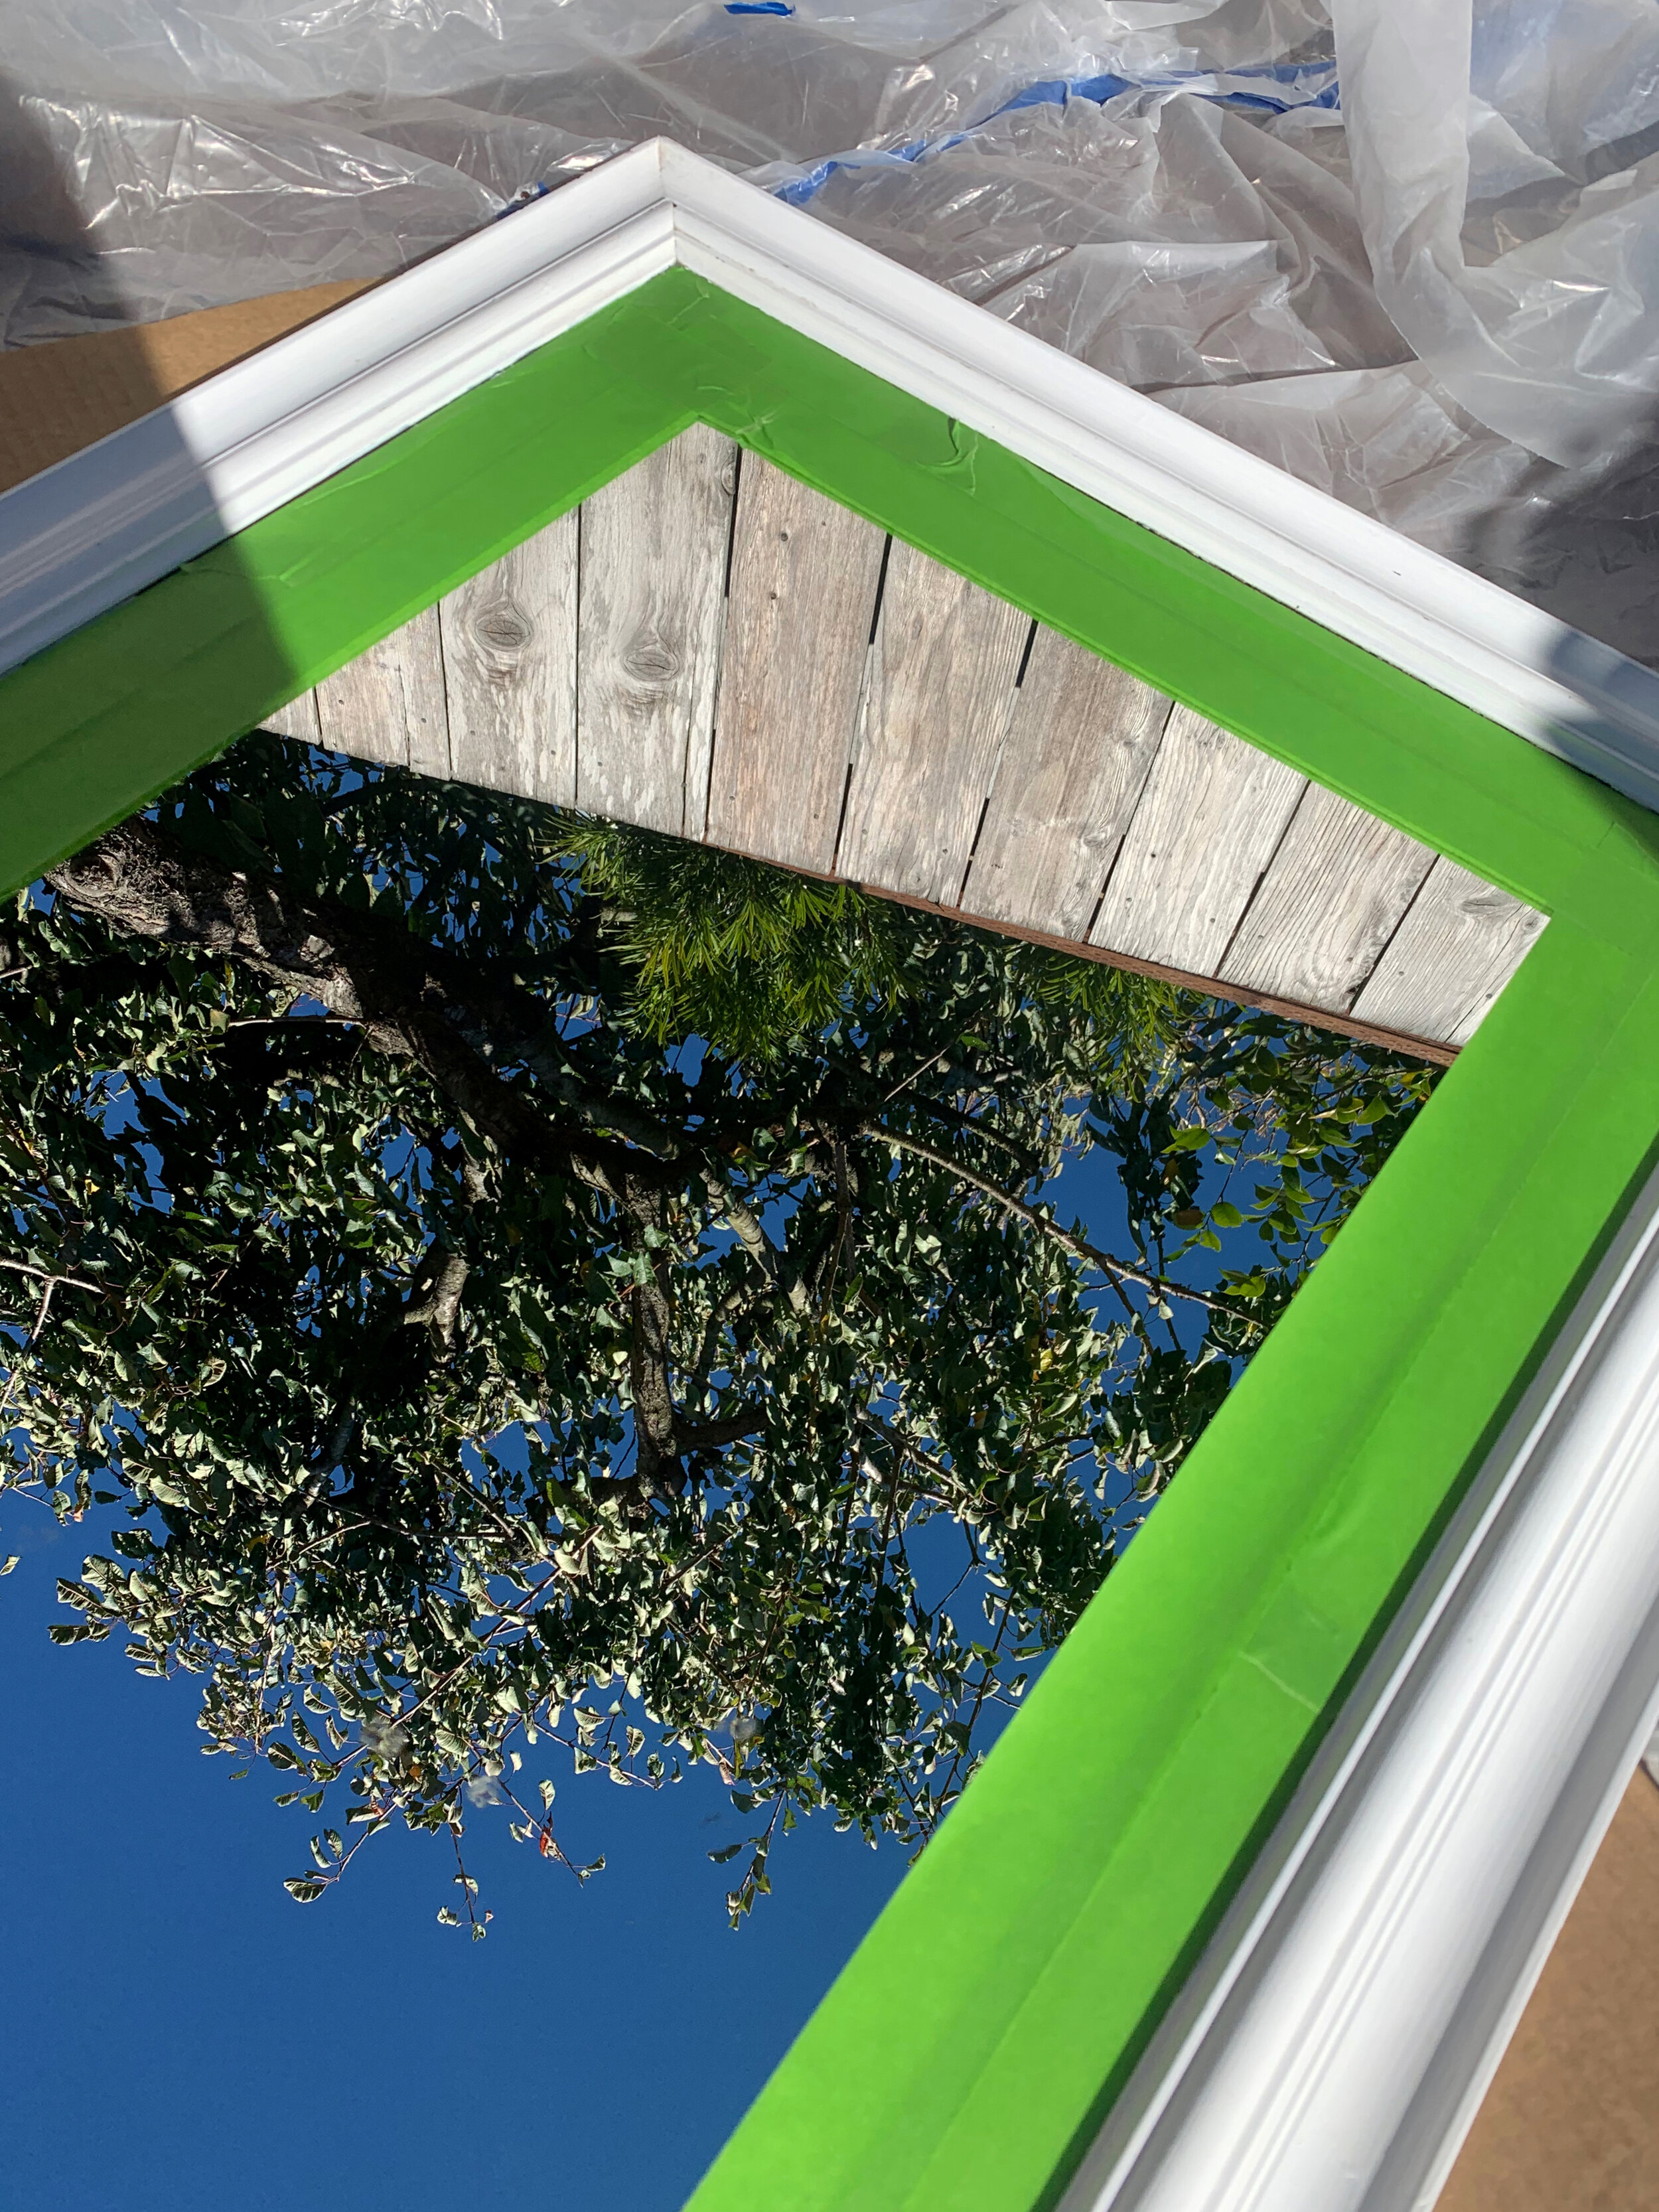
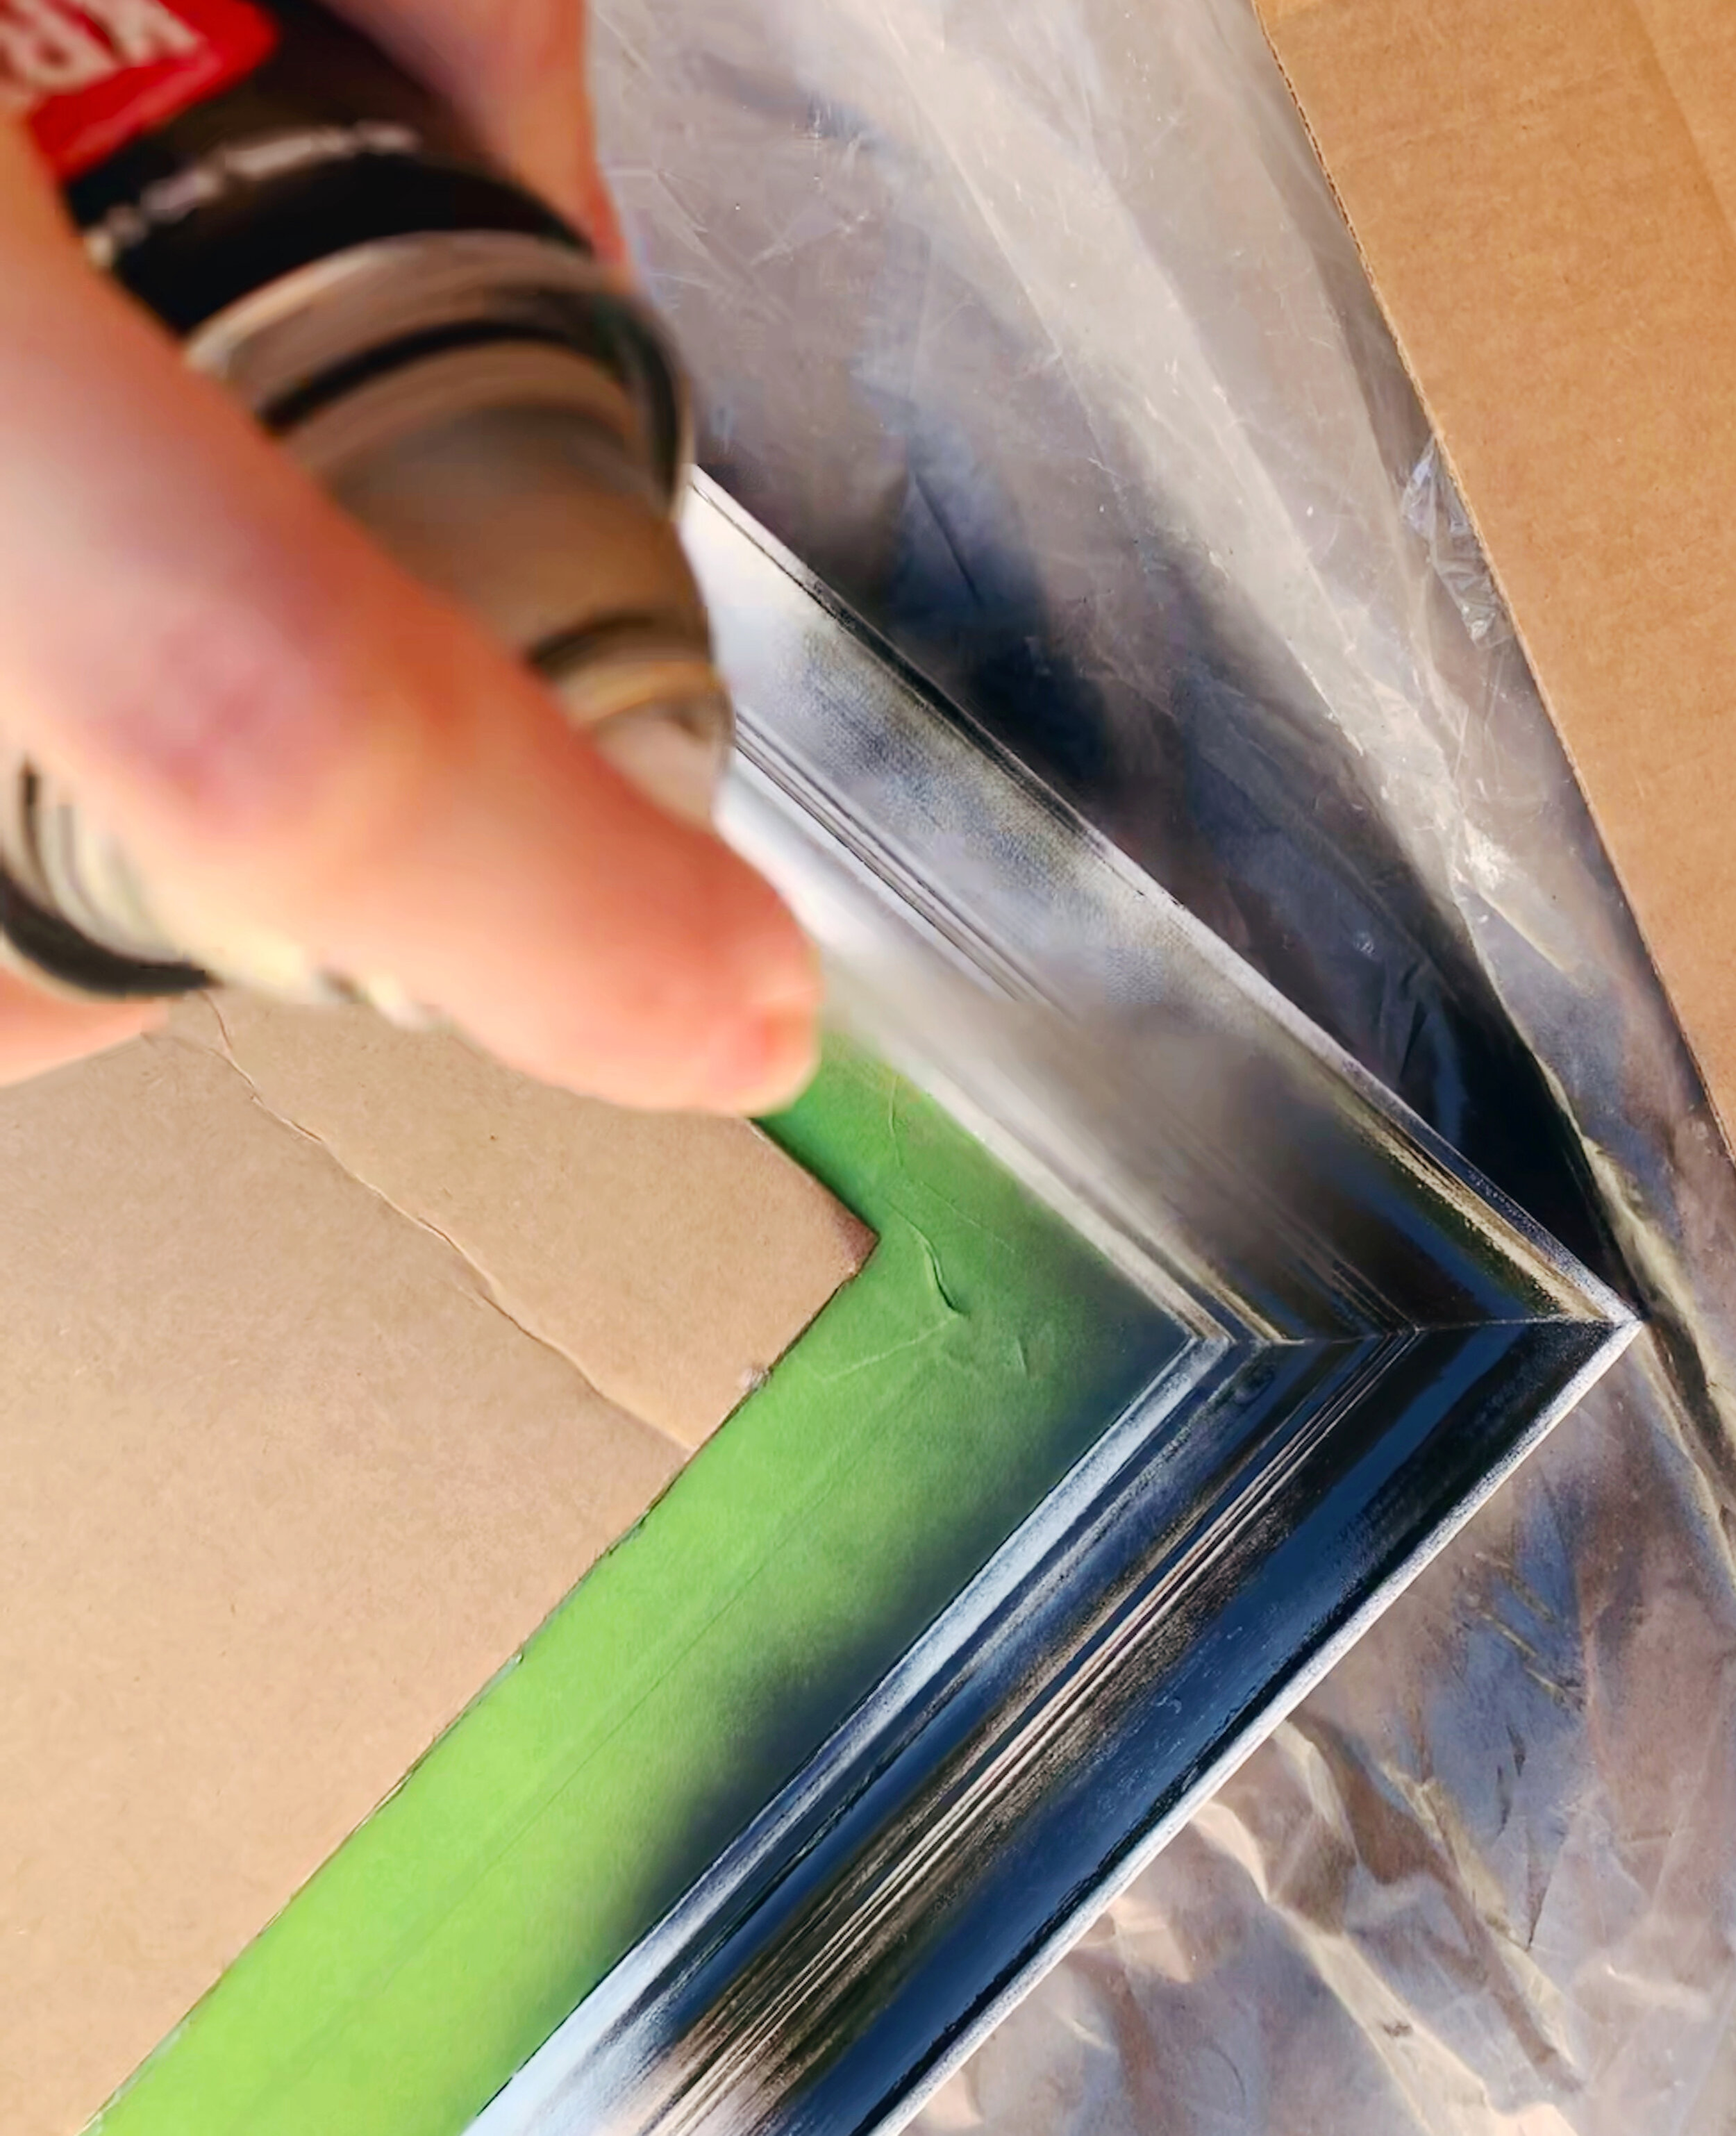
1. Tape off the glass portion of your mirror
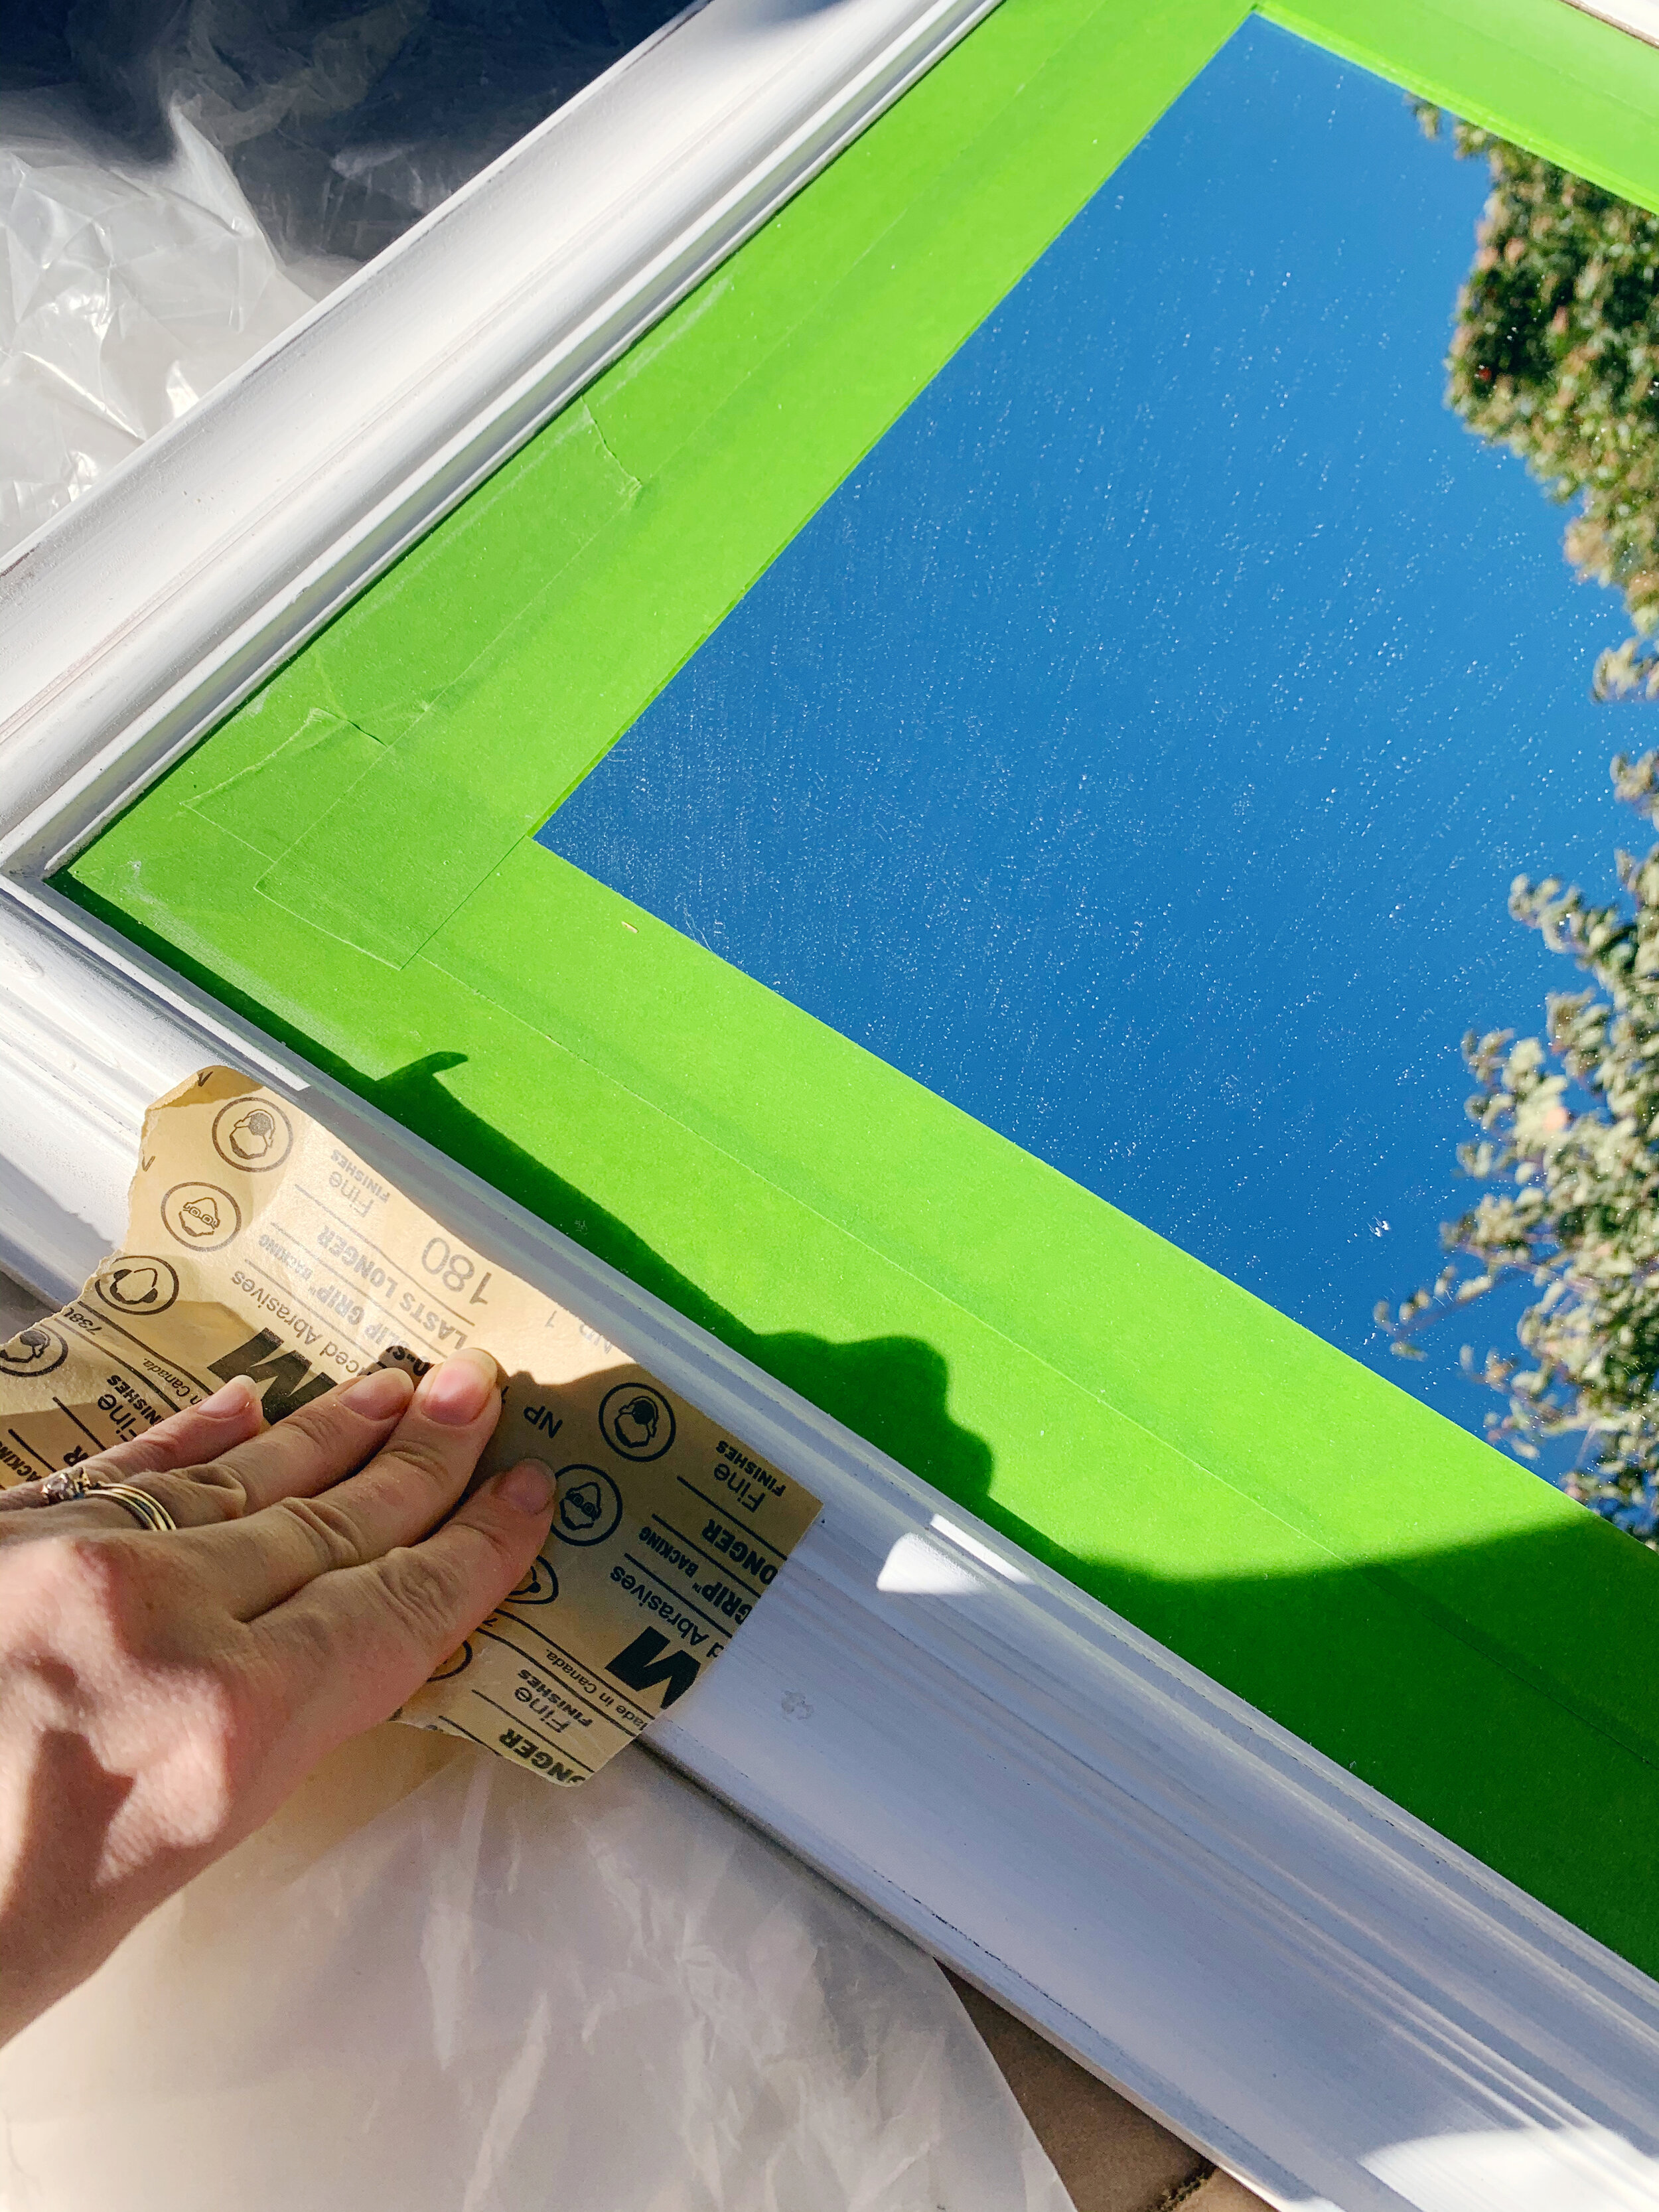
2. Protect your work surface with cardboard and work in a well-ventilated area (ideally outdoors)
3. Sand the frame to remove the gloss and lightly rough up the surface to grip the paint
4. Spray paint your mirror according to instructions; you’ll be covering the paint so a smooth, even finish is more important than perfect coverage
5. Allow to fully dry
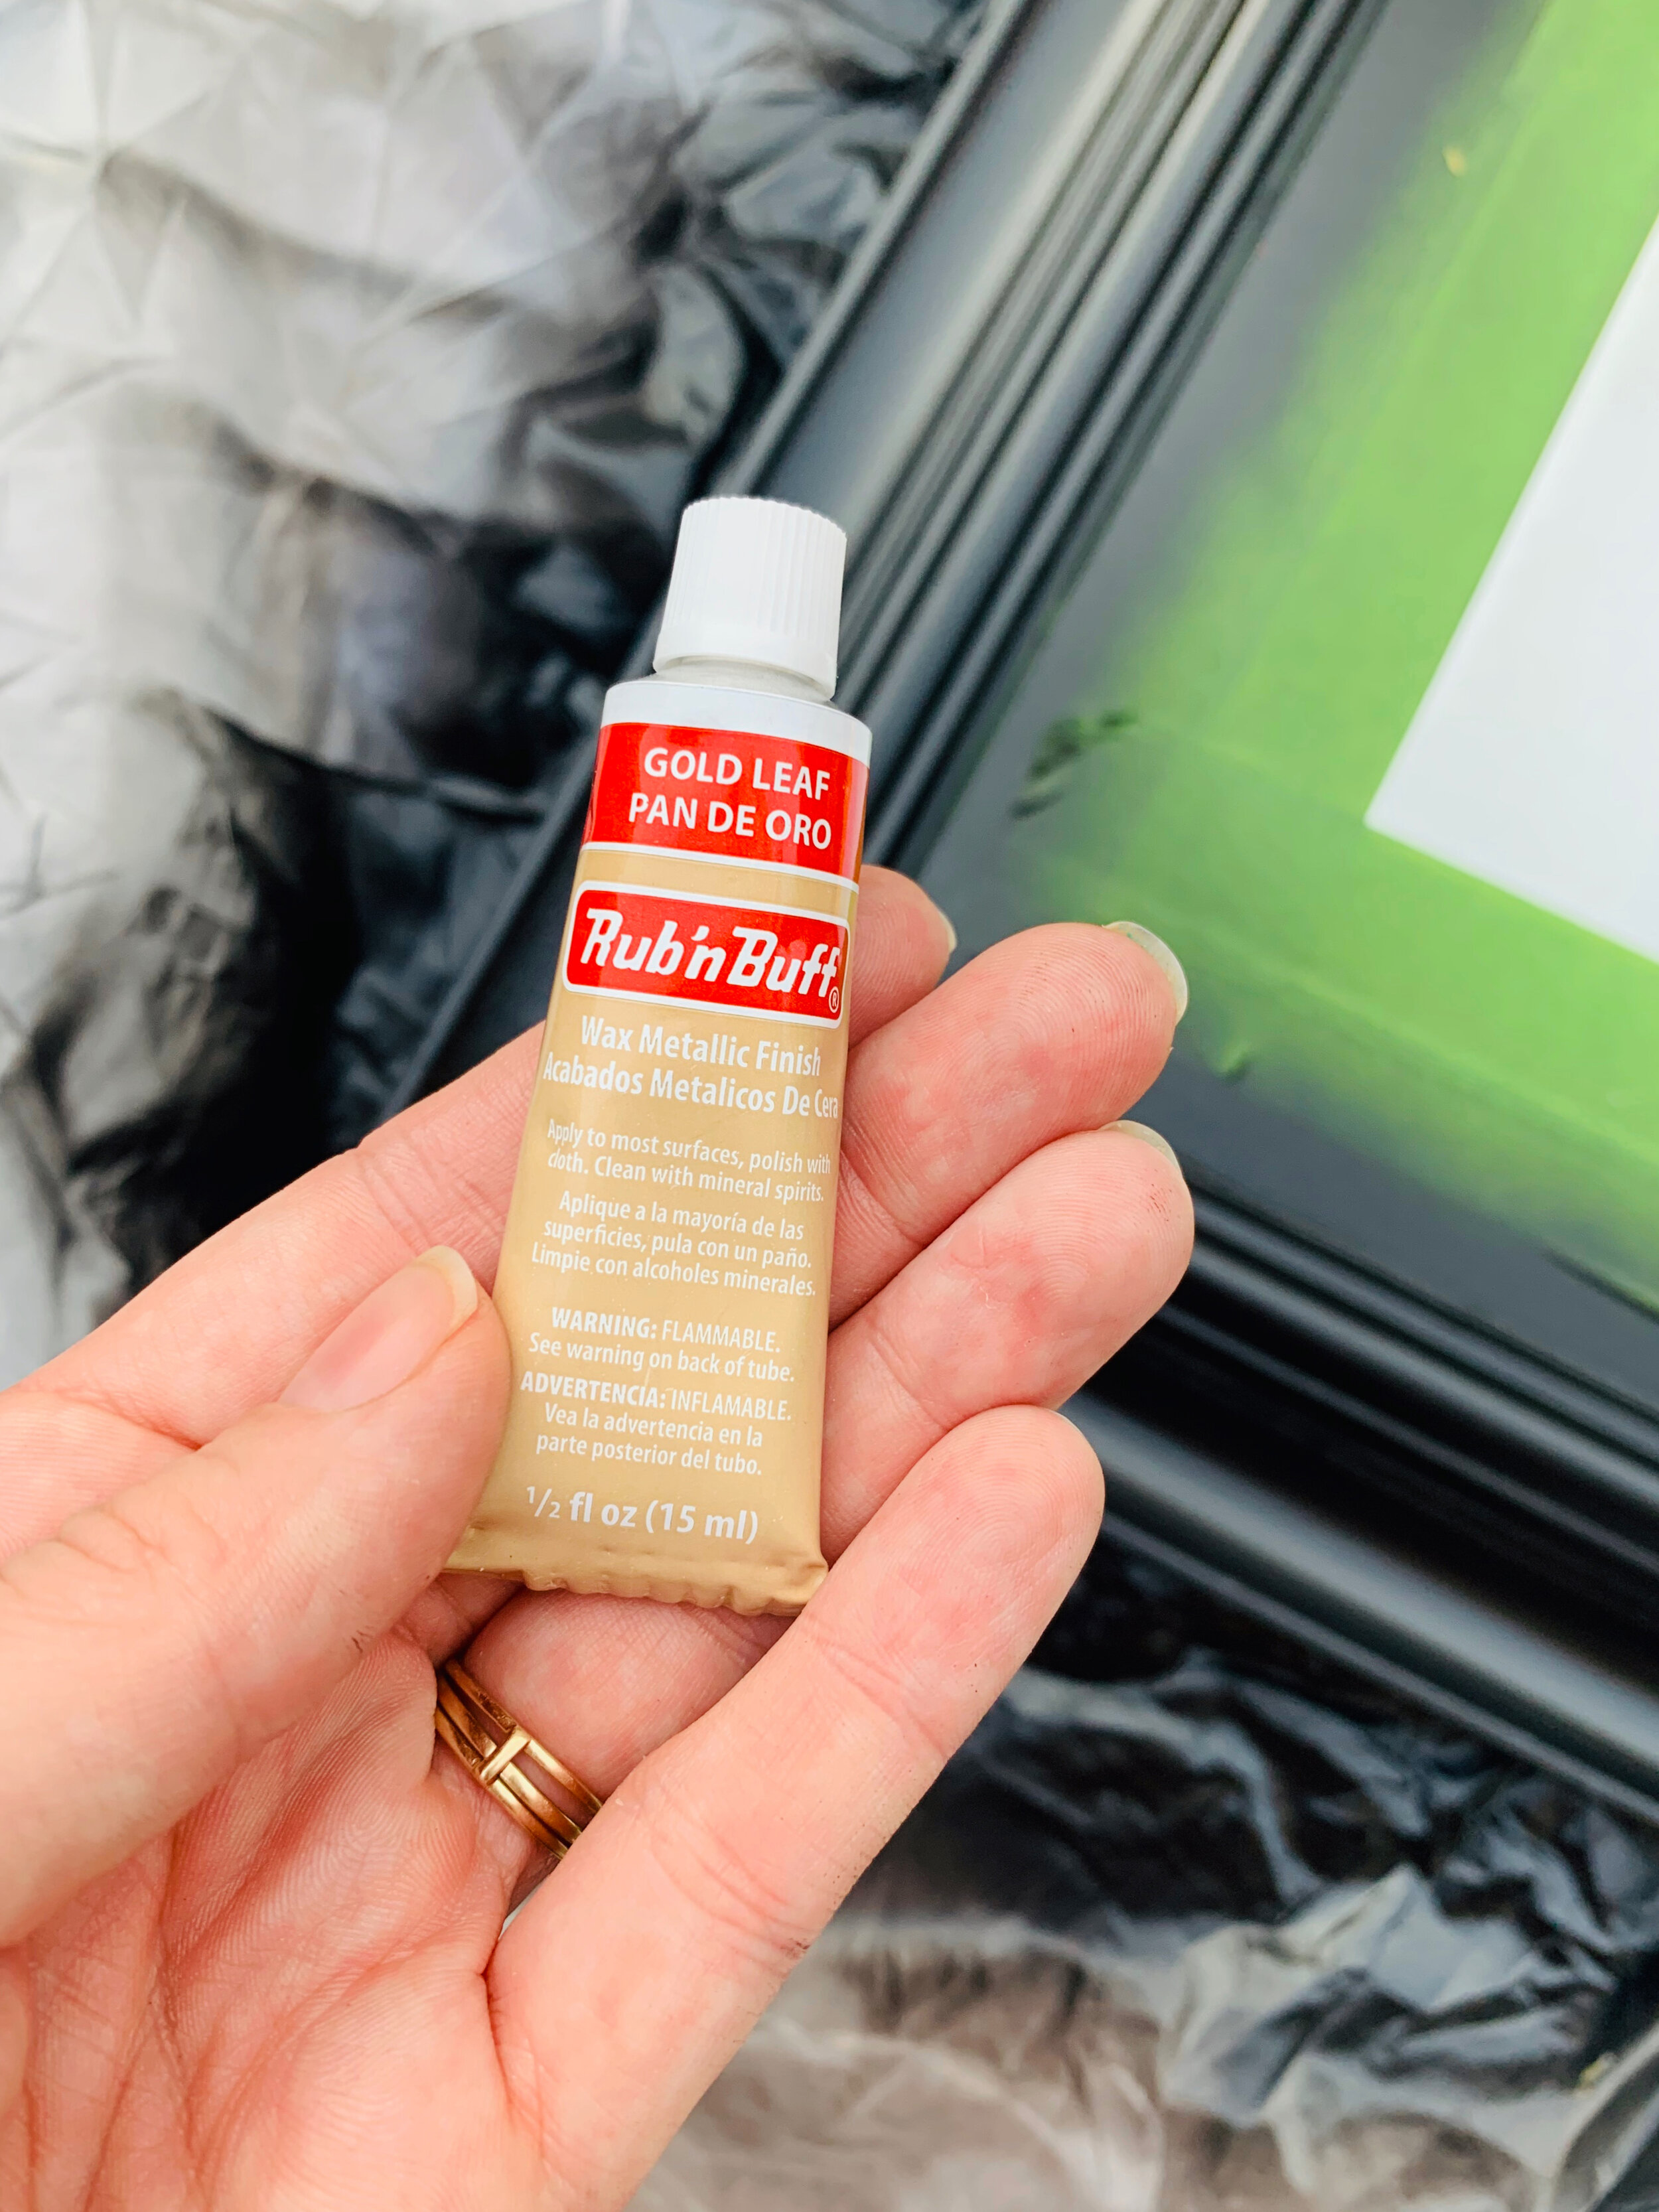
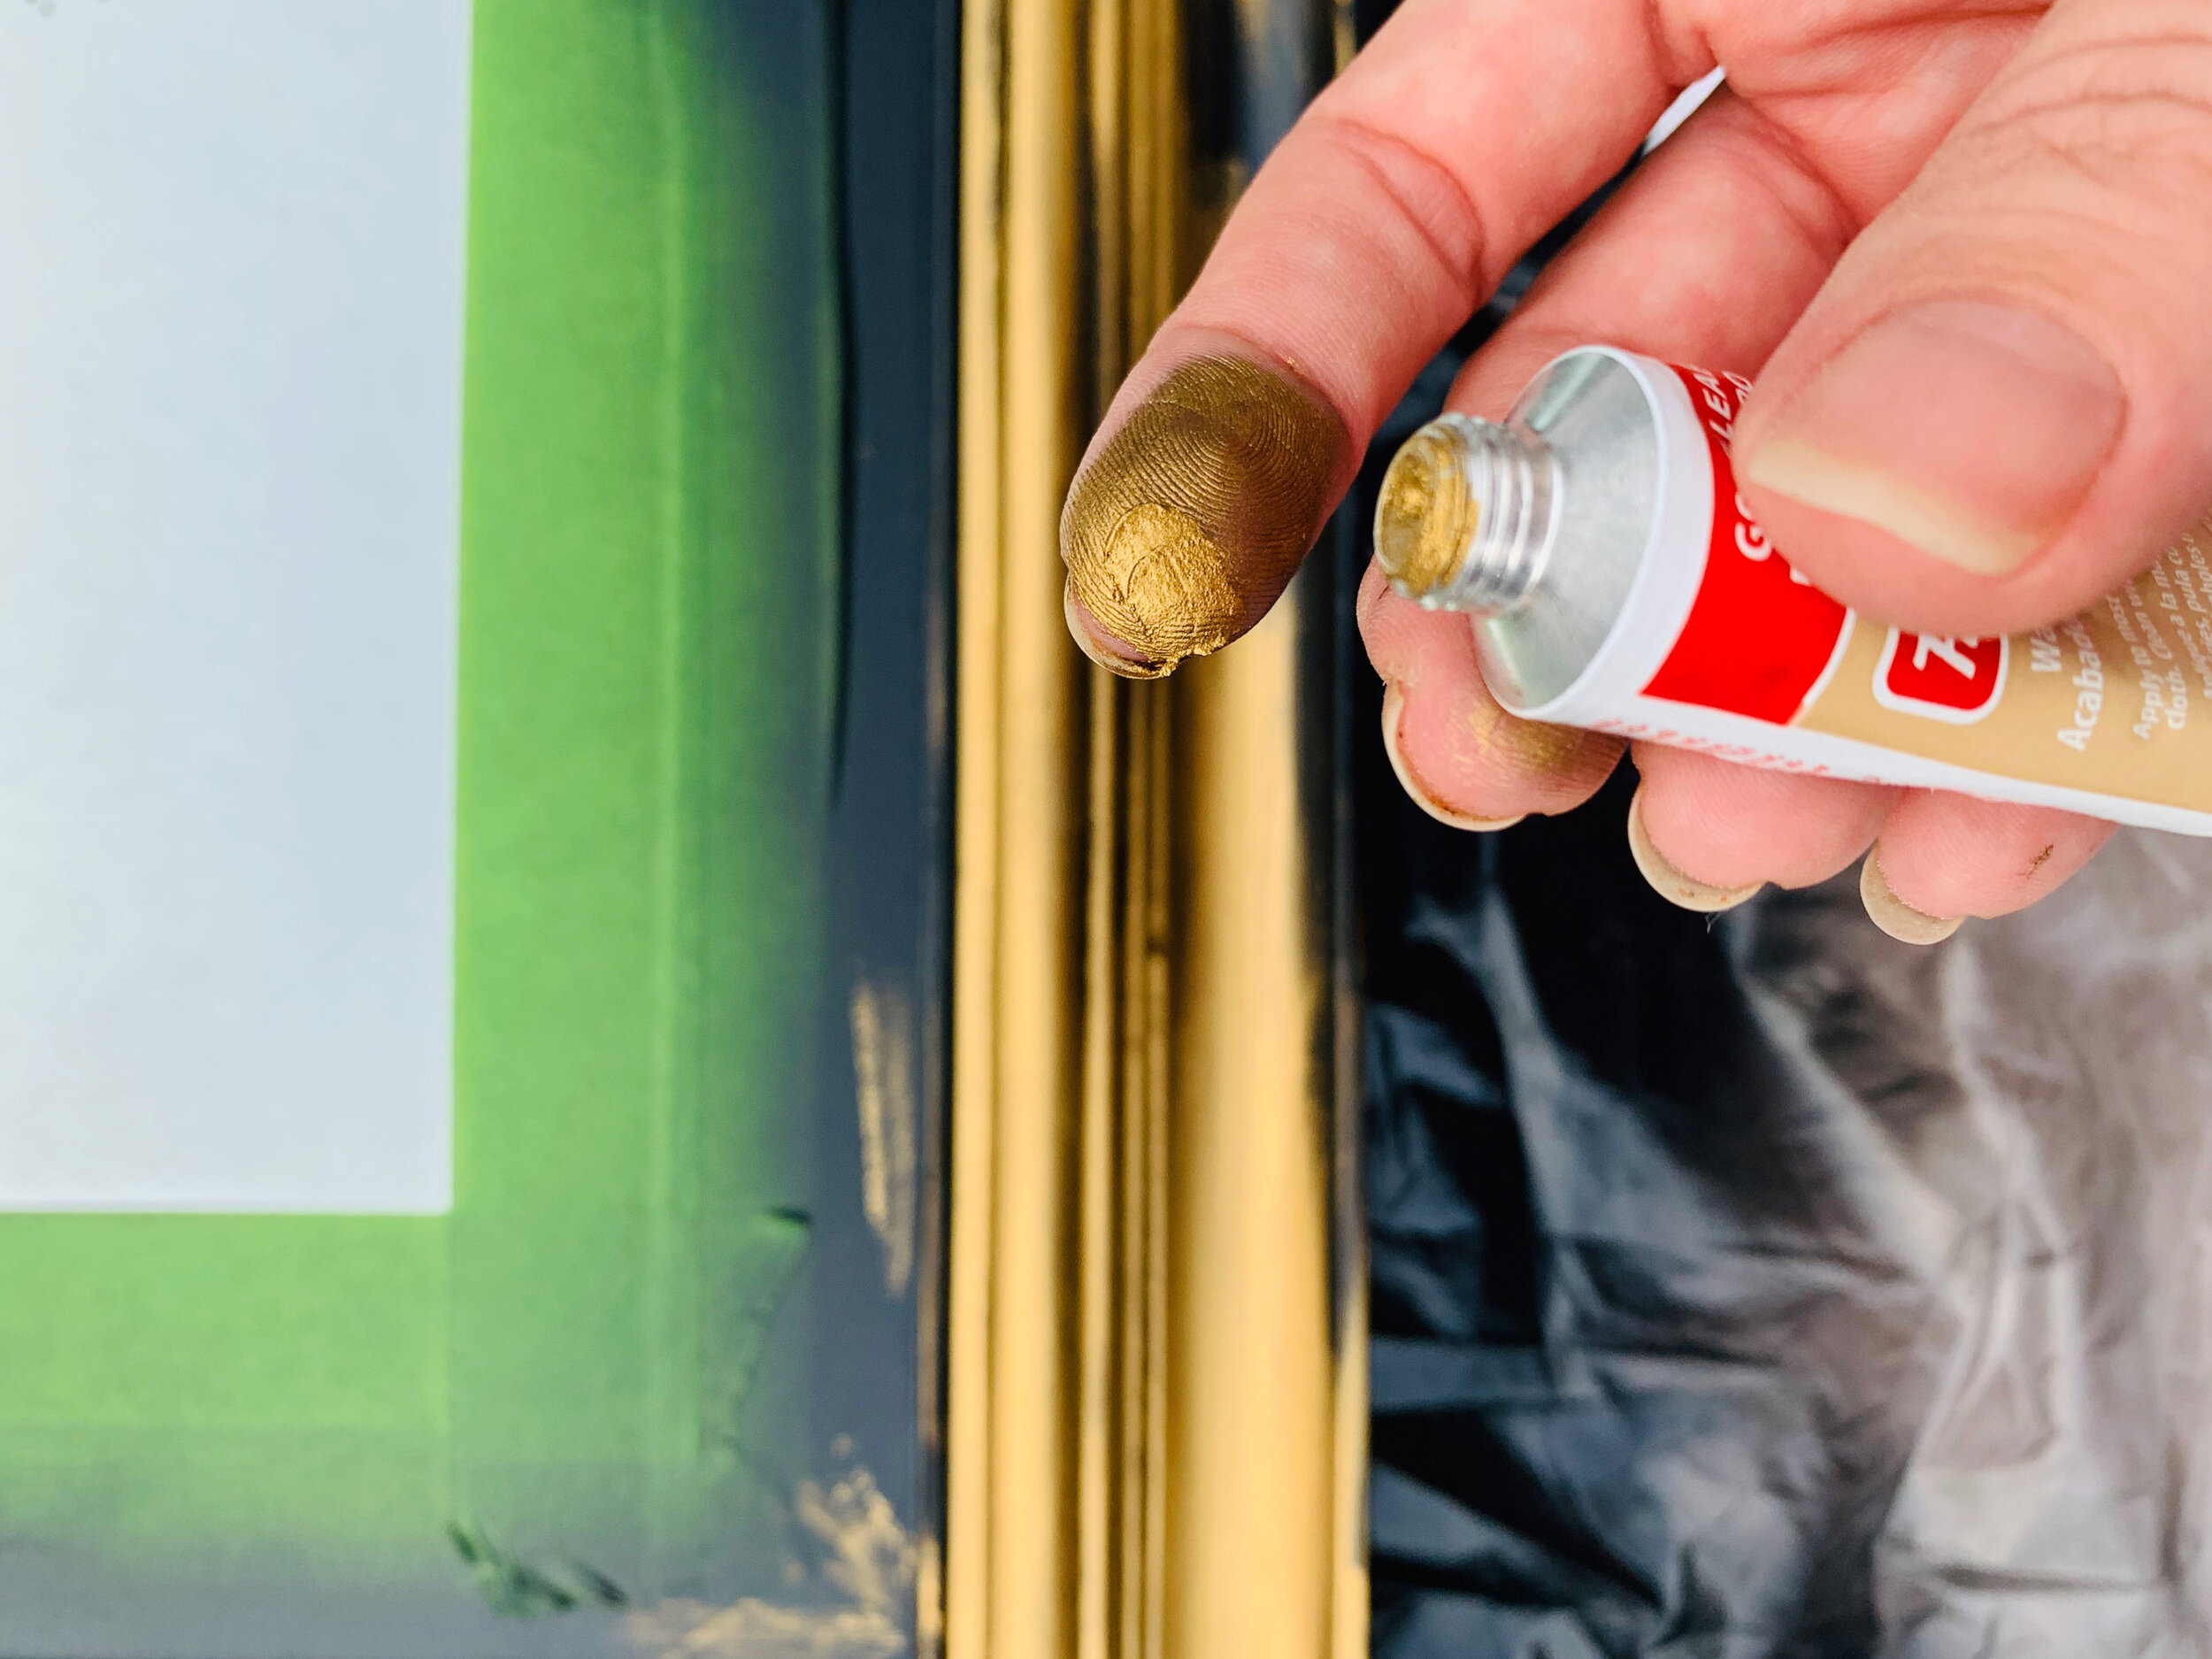
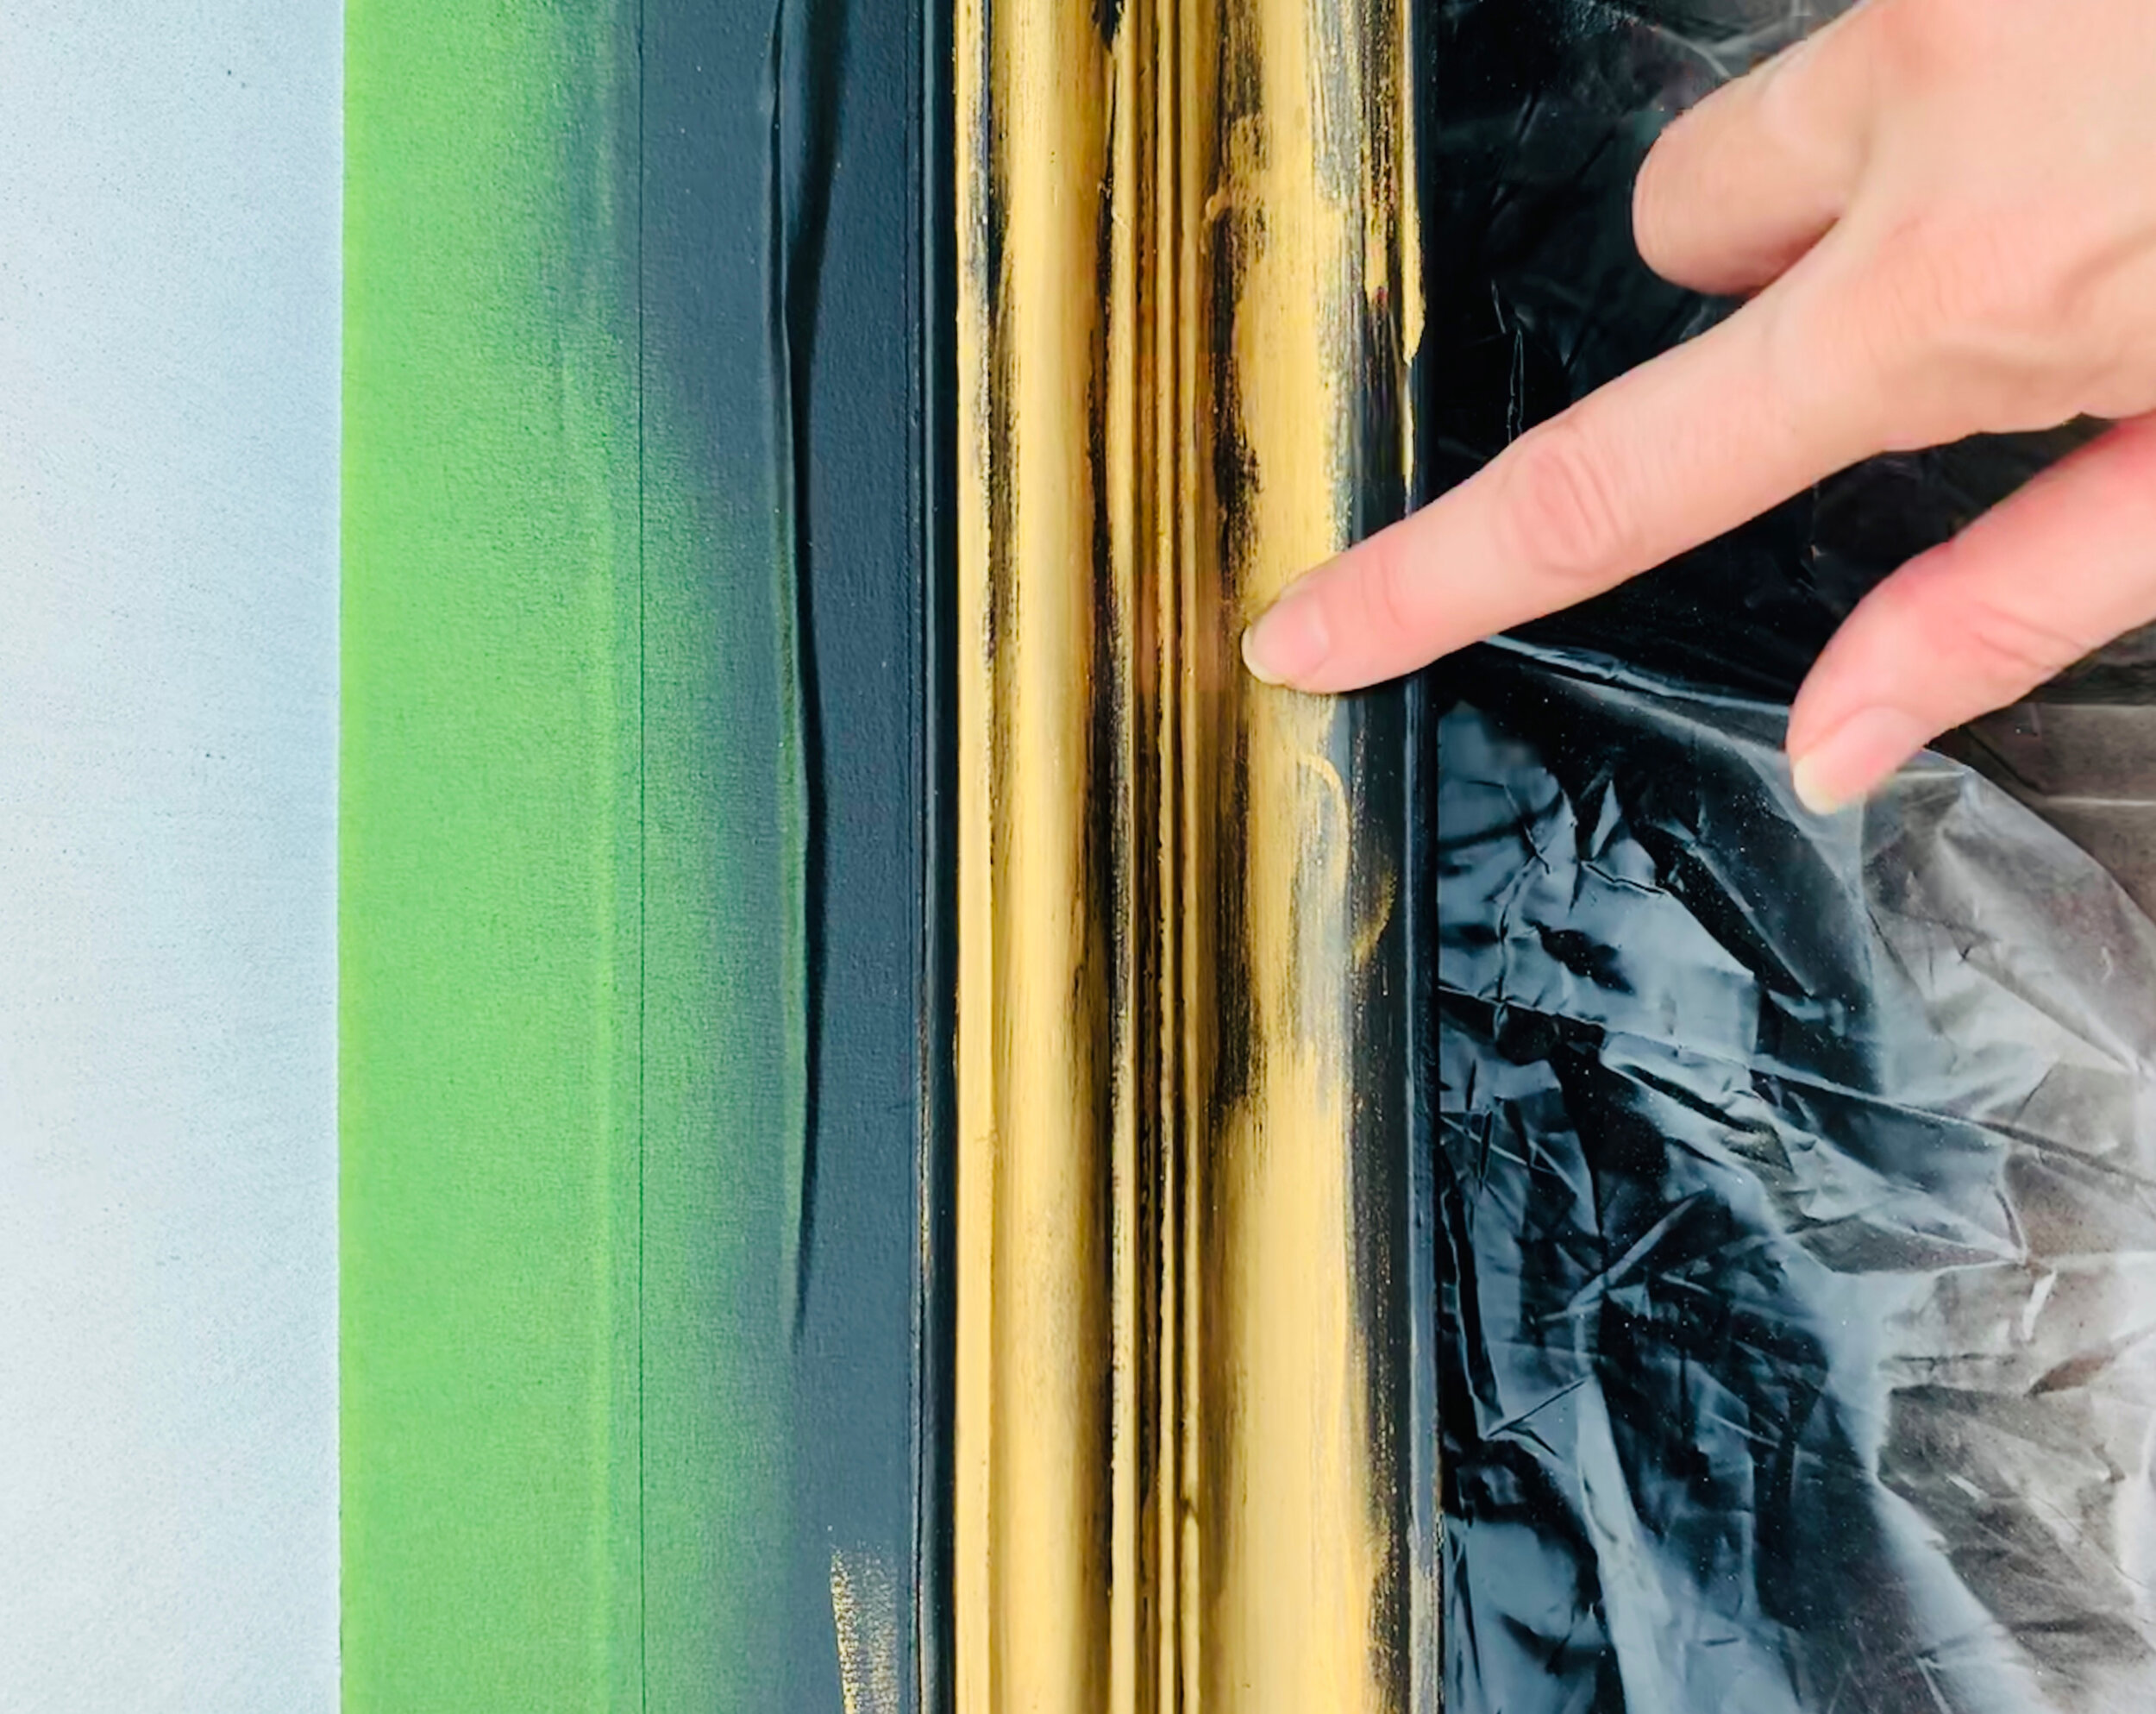
6. Apply the Rub’n’Buff using your finger or a brush. I tried both methods and ended up using my fingertip to cover the mirror as it didn’t absorb the product then going over the piece with a brush to get into the corners and crevices
7. Admire your work!
Tips
* A little product goes a long way, I only needed one tube for this large piece and still had plenty left over at the end
Overall I’m really pleased with how this project turned out, the finish is perfectly imperfect and the gold adds a lot of depth and really brings out the detail in the mirror. I’m a big fan of finding ways to reuse pieces in different spaces and I love that this curbside find has been a part of so many places that I’ve called home.
If you try this project out for yourself leave a comment or tag me on Instagram.
*This post contains affiliate links and I will be compensated if you make a purchase after clicking on my links